
How To Add A Custom Map To Your Photo Book
Learn how to add a custom map to your photo book using Google Maps or Adobe Lightroom Classic
By William Boggs
Following the tragic loss of Aperture and iPhoto after the iOS 10.13 update, photo book creators are turning to 3rd party sources such as Google Maps and Lightroom Classic for mapping their photographic adventures.
Choosing Your Map Creation Options
When adding a map to your photo book, we recommend using either Google Maps or Adobe Lightroom Classic’s Map module. Both options will show you the GPS coordinates of the location you select, which can also be used as a cool caption or visual element in your photo book!
Google Maps
Summary: Google Maps is quick, easy, and free to use. You can pin locations and even map a route between them, or get creative in a few other ways. The one drawback is that there is currently no way to filter out default map information such as pins / markers and location names.
Adobe Lightroom Classic’s Map Module
Summary: If you are a photographer, chances are you’ve already heard of Adobe Lightroom Classic. Lightroom Classic has a map module that lets you mark the location at which your photos were taken. One big pro with this option is that you can hide other map information (in some views). The catch is that you have to actually assign photos to each location you want to mark.
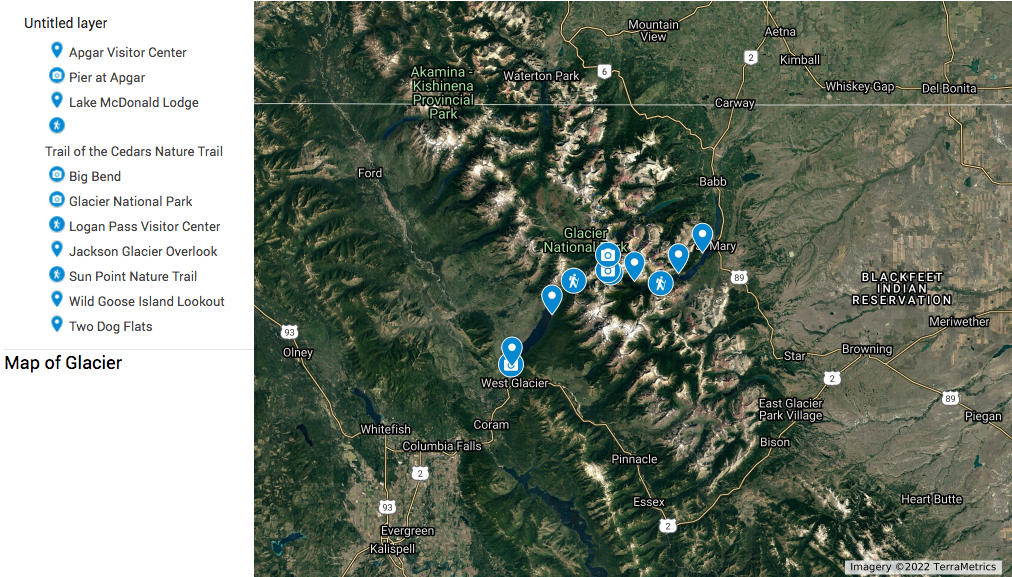
Creating A Custom Map For Your Photo Book With Google Maps
Start with these steps:
- Navigate to Google Maps
- Click the Menu icon > Your Places > Maps. At the bottom, click Create Map.
- Next, name your map and add a description. This can be something like: “Photo destinations in the US”
- Then name your layer. You can use this to further organize your map, since you can have multiple layers. For example: “Montana.”
- Now just start adding markers using the marker button just below the search bar! You can name your markers, change their icons, and even change the colors!
If you want to show a route between your marked locations, you can simply pick a starting location and click the Directions To Here icon. You’ll see a new layer appear with driving directions between your locations.
You can also use the Draw A Line tool to, well, draw lines! Select points to create lines between them, and connect 3 or more points to highlight an area. Once you’ve done this, you can change the color of your lines or selection, or if you chose to outline an area, change the color and transparency of your highlights with the slider.
You can further get creative by changing the base map to a different view, such as satellite or topographic, or one of 7 other options.
Once you’re finished creating, either take a screenshot or click the 3 dots icon in the corner of your legend and you can choose to print. Choose your export settings and you can save the map right to your computer!
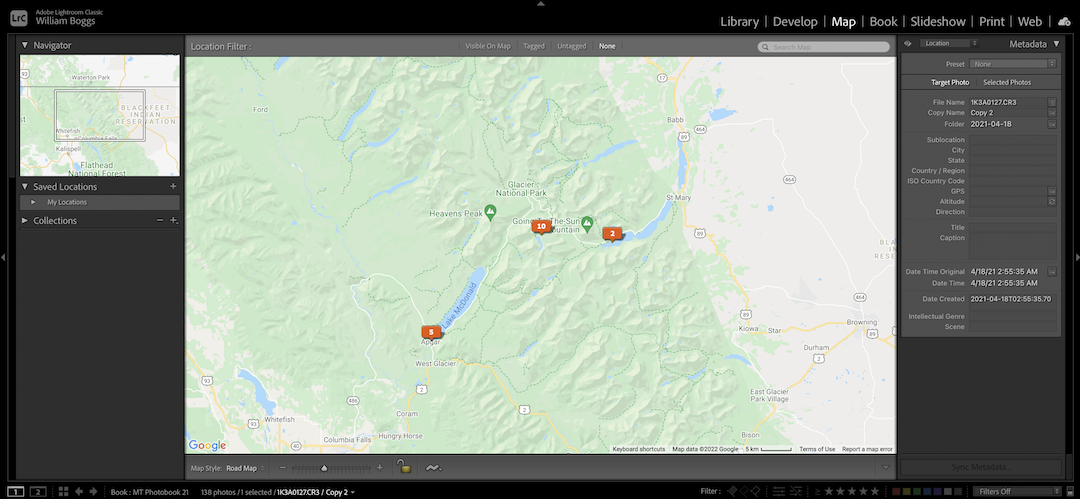
Creating A Custom Map For Your Photo Book With Adobe Lightroom Classic
The Lightroom Classic Map module is much less comprehensive than the previous option, but can be a bit easier to look at since you can hide map markers and location names. All you have to do for this option is:
- Open Lightroom Classic.
- Make sure you have a collection of photos to apply to your location markers.
- Select the photo you want to assign to a location.
- Find the spot you want to mark and right click to Add GPS Coordinates to Selected Photos. (Note that this will update the location metadata on your photos).
When you’re done setting your markers, simply take a screenshot!
Adding Your Map To Your Photo Book
Once you’ve created your map of choice and exported the image you’d like to include in your photo book, upload your image to your photo book and you are good to go!

William Boggs
William is a professional photographer, filmmaker, and marketer. When he's not working at PrestoPhoto, he's utilizing his talents in other creative ways and helping small businesses grow! Learn more about him on his website at Boggs Creative or follow him on Instagram at @whboggs