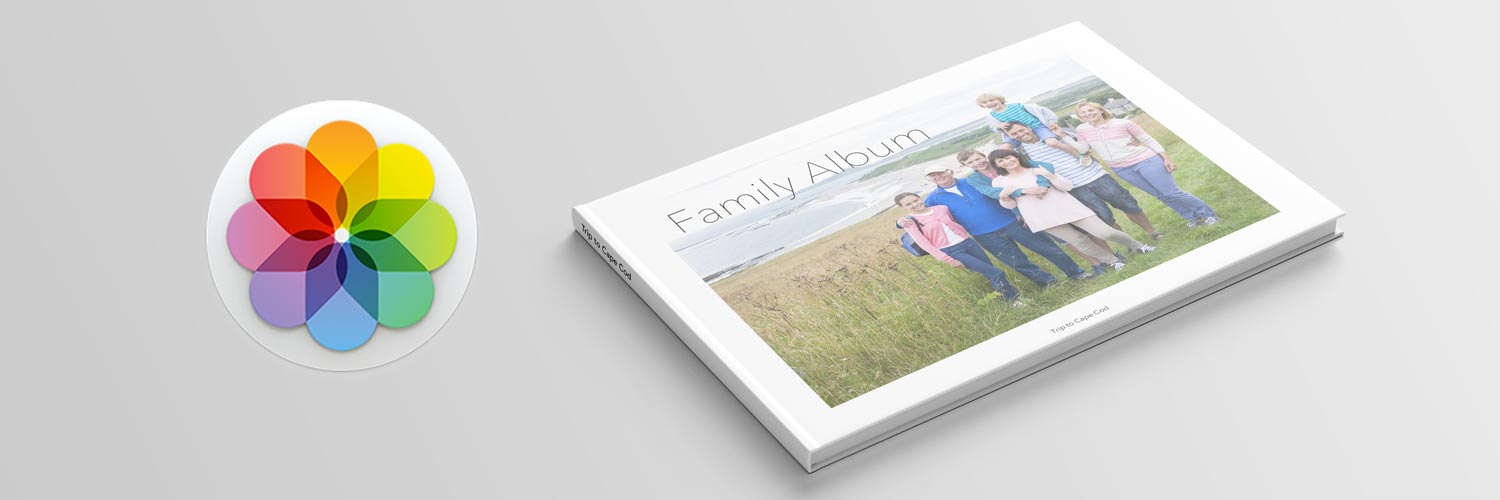
How to make a photo book with Apple Photos
In this blog post we are going to show you the ropes making photo book projects in Apple Photos
By Tim Weaver
Designer at Presto Photo
PrestoPhoto macOS App for Apple Photos
 Beginning with macOS 10.14, Apple has completely disabled project editing in Apple Photos. But don't worry! PrestoPhoto has a native macOS Photos Extension that let's you create photo books, calendars, card, gifts, and wall art right inside Apple Photos, just like the Apple project creator! You can even import your old projects.
Have you been wanting to create a photo book with the Apple Photos photo management app for macOS, but don't know where to start? In this blog post we're going to show you the ropes on how to make Apple photobooks you'd be proud to put on the bookshelf, the coffee table, or as an thoughtful present for a loved one.
Apple Photos
Apple Photos is the current version of Apple's photo management library tools (previously it was iPhoto and Aperture), so it's most likely the software you have access to at this moment. If you have purchased an Apple computer in 2015 or after, or if you've upgraded your Mac's operating system to Yosemite 10.10 or later, it's most likely on your Mac. Apple Photos is a great program for creating quality photobooks, it allows for easy customization and has a lot of different sizes and themes (we like to call them templates) to choose from.
Please note: If you have macOS Mojave 10.14 (and Photos 4), this process is no longer accessible to you. For anyone that is on earlier versions of Photos with macOS 10.13 and earlier. this process should still be available for you.
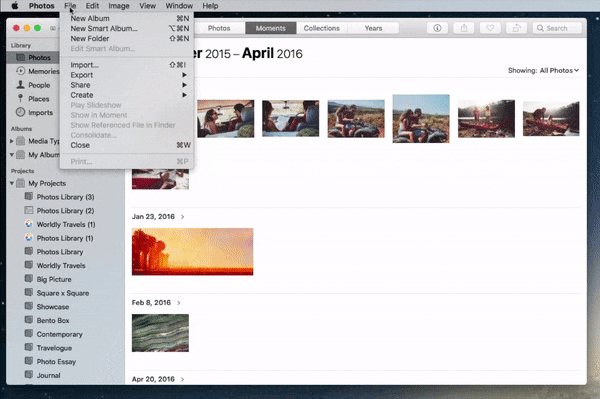
1. Start your Photo Book Project
Go to File -> Create -> Book, and you'll get a window asking you to choose your book format, like hardcover books or softcover books. If you begin by auto filling your book with photos from one of your albums, select the photos in your Photos library first by holding the command key on your keyboard and clicking on each picture, or using your mouse you can select a lot of photos at once by clicking on the background and dragging your mouse cursor over all of the photos you want in the book, and then go to File -> Create -> Book.
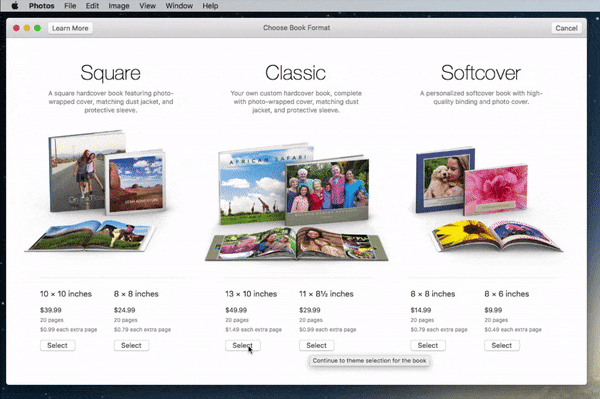
2. Choose your photo book size
Once you start your photo book project, you have to decide the size you want to make your book in. There are six separate options here: Square books in 10"x10" or 8"x8" hardcover books, Classic (landscape) books in 13"x10" and 11"x8.5" hardcovers, and softcover books in 8"x"8 and 8"x6". Once you have decided, click the Select button below your option. While you can change the size of the book later, if you order an Apple Photo Book through Presto Photo's photo book service we can scale books of similar dimensions (we can print your 10"x10" photo book as a 12"x12" for example) to sizes apple did not provide. Just make sure you pick the right format (Square or Landscape), because there is nothing that can be done to change a book from landscape to square or vice versa down the line.
Just to the left of the Buy Book button is a button with a book icon that you can click to change your books options after you have started creating. You can pick a new theme (which will adjust your books layout), you can choose a different sized book, or add and delete more pages.
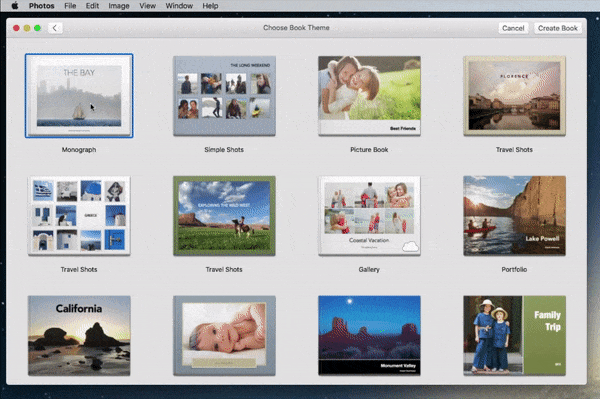
3. Choose your photo book theme
There is a wide list of themes to choose from, look through and see which one suits you best. You can create a few test books to see the design of the pages inside if you like. One you have picked the design you want to use, either double click on the theme you want or select it and click Create Book in the top right hand corner.
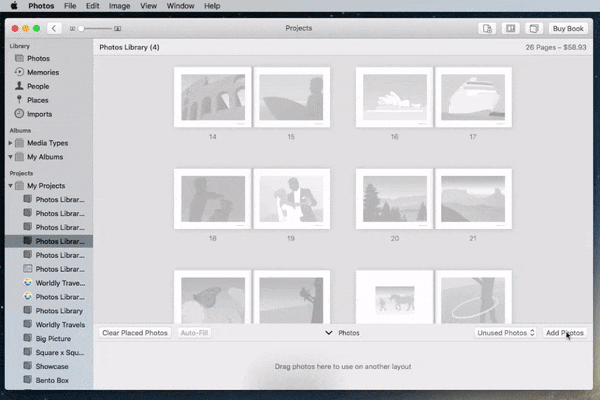
4. Add your Photos
After you've chosen your theme, you have a nice blank book ready to fill it up. At the bottom right of the window is the Add photos button, so go through your photos and pick out all the ones that you want in the book. Once they've been selected, click on the blue Add button in the top right hand corner. You can always add more, and don't have to use all of the ones you pick if you decide against a few later.
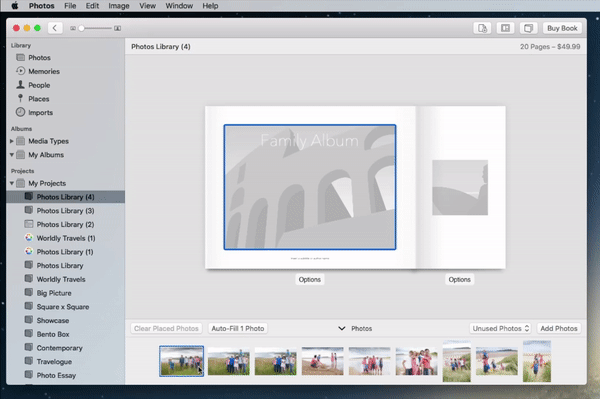
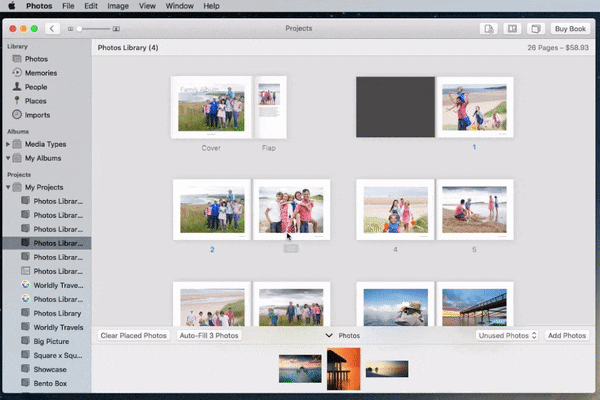
5. Place your Photos
Start placing your photos in your book, working front cover to back cover or skip around as needed. Drag and drop images from the photo panel at the bottom to the gray placeholder images above to place your images.
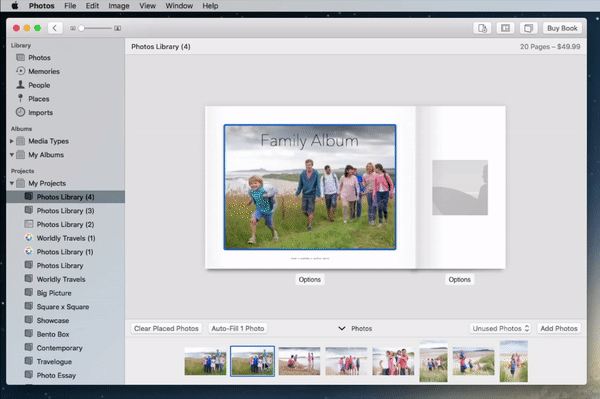
If you want to replace an image, just drag another image in its place to replace it.
You can also place images from the book view by dragging and dropping photos onto respective pages from the book view menu.
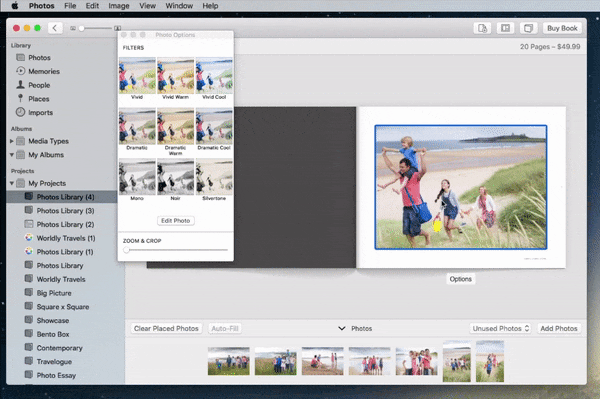
6. Crop and zoom on your photo
Sometimes when you place your photo it looks perfect, other times it doesn't crop right at all. To adjust how it is displayed, click and hold on the image and drag it around within the layout box it's in to move it around. To zoom in, double click on the image to bring up the Photo Options pane, where you can zoom in on your photo. Here are also some filter options if you want to add some extra flair to a photo.
7. Adjust and Insert Text
Anywhere where there is placeholder text or text boxes, simply click on the text, erase what was there before, and type out your desired text. If you don't want text in a spot where there was placeholder text to begin with, just delete all of the placeholder text in those text boxes and leave it blank.
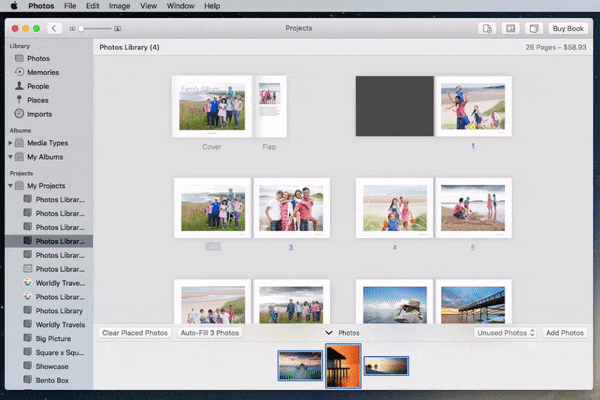
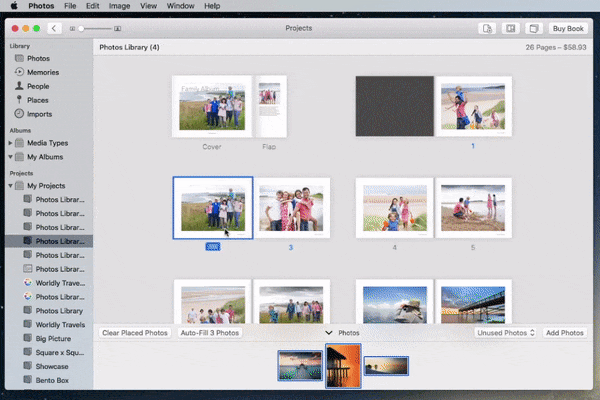
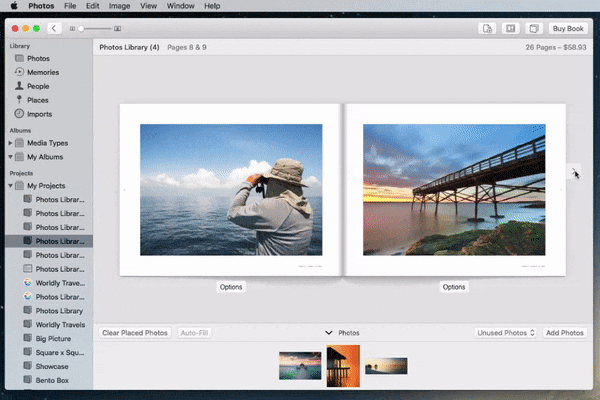
8. Navigate around your book
One of the least intuitive parts of Photos for me initially was navigation, but I'll briefly go over how to get around. Double click on any page in your book to get a view of that books spread (left and right pages side by side). Once there, hover to the side of the image to bring up the control arrows to move forward and back in your book, like you are flipping through it.
If you need to get back to all of your books pages, click the back button in the top left hand corner to see the entire book again.
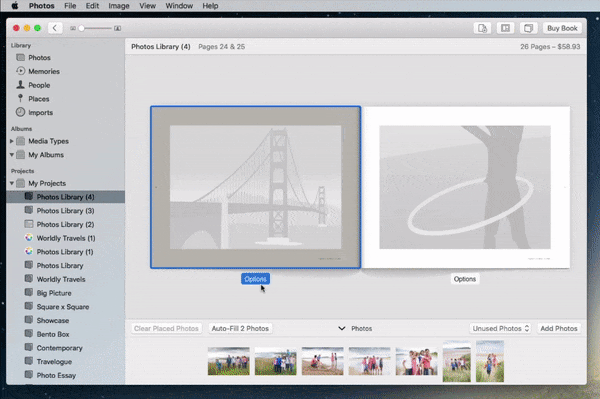
9. Change the Layout Options of a page
Every template has multiple layout options per page. To access these, press the Options button underneath the page to pull up all of the layout options available to you in your book in a pop-up menu. Not only can you change the layout design in this window, you can also change the background color of any page within this window as well.
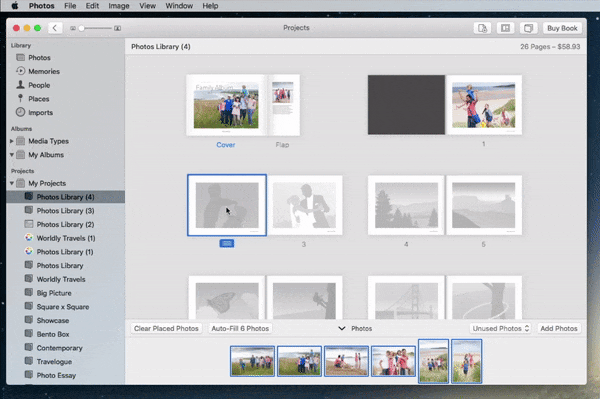
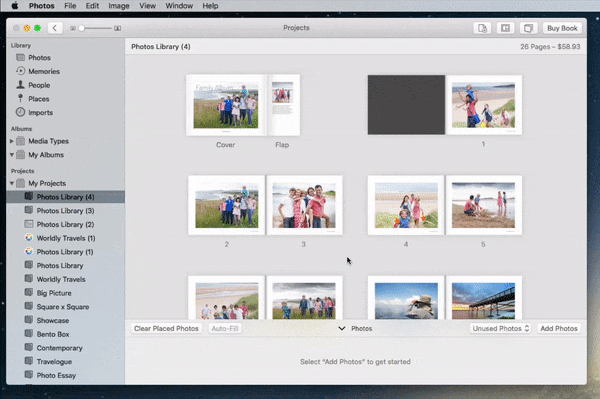
10. Reorder your pages
Changing the order of your pages is extremely easy: in the full book layout view, grab a page with the button below that appears when you hover. Click and hold on the page you want to move, then drag it to the desired placement in the book.
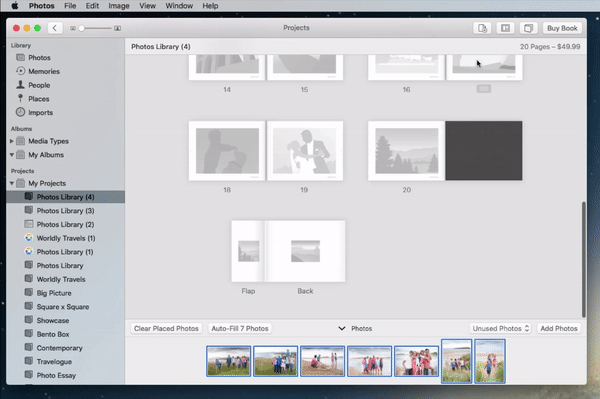
11. Add more Pages
Add extra pages to your book by clicking on the button with the blank page and the + sign, and select Add Page and add as many pages as needed. This will add a page after the page you have selected in the book thumbnail layout, so if you need an extra few pages at the beginning or end, make it easy on yourself and select a page near where you need them. You have a max of 100 pages within the program, but there is a easy way to combine books to reach over 100 pages. If you need to remove a page, select a page and click on this icon again, and select the Remove Page option from the drop down menu.
12. Export your book
After you have completed your book, it's time to buy it. Apple has ceased production of all photo print products, including their photo books. But there is still a way to purchase these books: Presto Photo. Simply hold the option key on your keyboard and click on the Buy Book button in the top right hand corner, or you can hold the control key on your keyboard and click on the gray background in the window. This brings up a new window where you save out your PDF. Name it how you like, and remember where you save it out to for easy access later. From that point, we would suggest uploading your Apple photo book to our site, and printing through our quality photo book service.

It'll take anywhere from a minute to a few minutes to export, and then you're ready to purchase!