
Creating a photo book in Apple iPhoto
In this blog post we'll show you how to create a photo book with your iPhoto library and prepare it for printing!
By Tim Weaver
Designer at Presto Photo
Trying to create a photo book with iPhoto® and need some help getting started? In this blog post we'll cover the basics of using iPhoto®, from selecting photos, selecting sizes, or changing your theme. Using your iPhoto® photo library, create gorgeous custom photo albums, photo journals, or scrapbooks quickly and easily, with Apples custom theme designs. It's pretty easy, so let's get started.
Apple iPhoto®
Apple iPhoto® is the previous version of Apple's photo management library tool before Apple Photos, which Apple supported until 2015. If you have purchased an Apple computer in early 2015 or before, it's most likely on your Mac. If you purchased a Mac with iPhoto® and upgraded to OS X Yosemite 10.10.3 and up, you should still have access to iPhoto® as well, though changes you make in iPhoto® and Photos won't sync to each other. The main reason I mention this is there are a few template options that are not available in Photos, so you may want to back track to this version for certain themes (we like to call them templates).
1. Select your photos
In your iPhoto® library, select your photos either by holding the command key and click on the photos for your photo book. If you accidentally click away at this moment you will lose all of your selected photos, so an easy way to prevent this is to create a new album, and drag the photos to the album that you want in your photo book as you select your photos. Once all of your photos are placed in the album, click a photo and press the Command Key + A on your keyboard to select all images in your album.
Forgot photos, or need a few more to fill up your photo book? Go back to your photos library and drag the photos to your book project to add more photos.

2. Start your Photo Book
With your photos selected, go to File -> New Book, and iPhoto® will switch to the book creation tool. This is where you will pick your theme, size, hardcover, softcover, and colors of your photo book.
| Hardcover | Softcover | Wire-Bound |
|---|---|---|
| XL (Extra Large, 13"x10") | L (Large, 11"x8.5") | L (Large, 11"x8.5") |
| L (Large, 11"x8.5") | M (Medium, 8"x6") | M (Medium, 8"x6") |
| S (Small, 3.5"x2.625") |
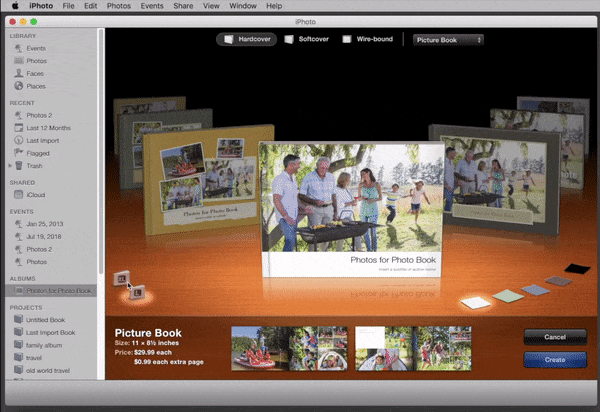
Start by selecting a size and binding type (some photo book printers, like Presto Photo, can print photo books at different sizes and binding types, so this part isn't as important), and then select your theme.
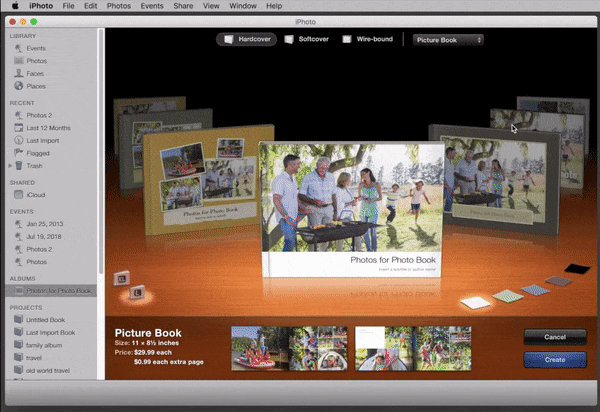
You'll see a small preview on the theme at the bottom of the window with your selected photos, and if you decide later to change your theme you easily can. To the right are color options to select from (they look like post-it notes). Select the one you prefer, and then click on the Create button.
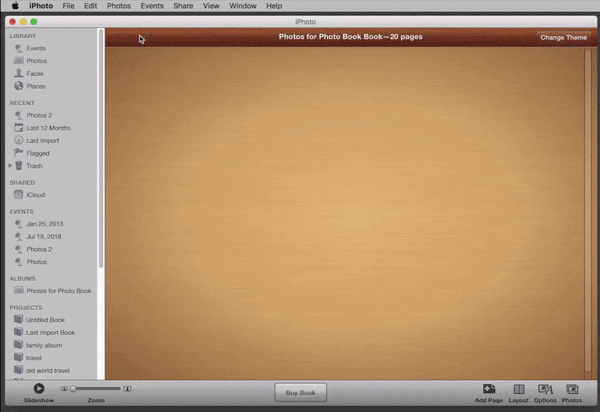
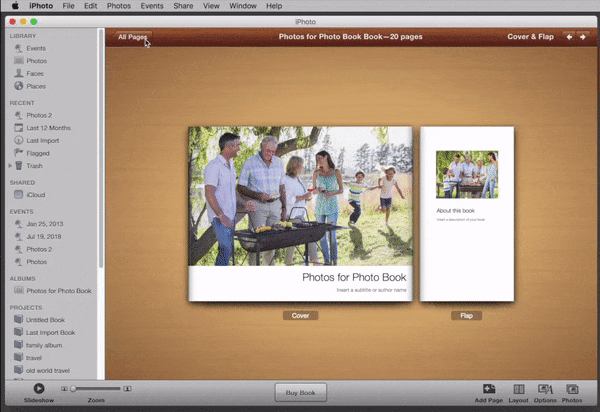
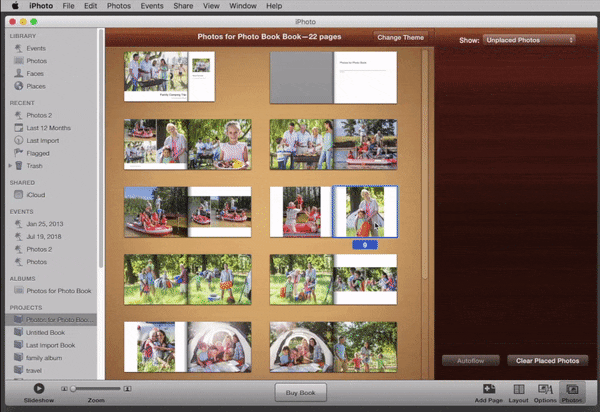
3. Navigating your Photo Book
Once inside your photo book, you'll see a full overview of the entire book. If you had enough images selected, it may even be filled already with your photos (this isn't set in stone, we'll get to that in a moment). To edit a specific page or your front covers, double click on the section you want to edit and it will focus on that section. Your front and back cover will also include your dustjacket flaps as well. To get back to the full overview, click the All Pages button in the top right hand corner, or flip through the pages with the arrows in the top right hand corner of the window.
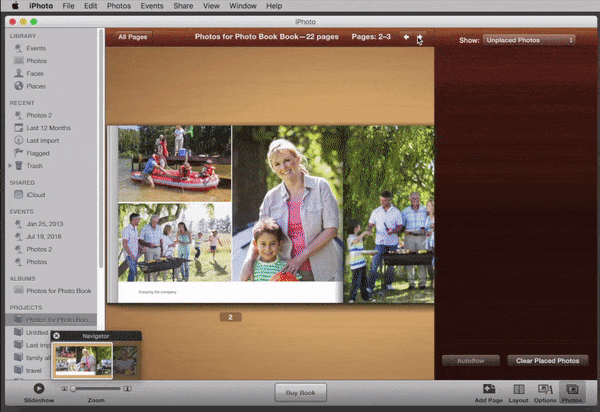
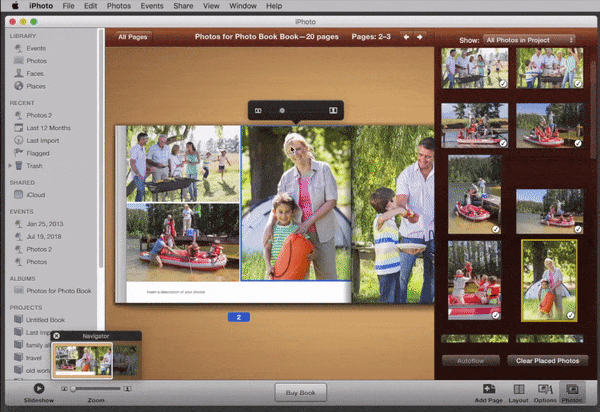
4. Placing and moving photos
To place an image, click the Photos button in the bottom right hand corner to access your photos. Drag the photo to an empty spot in your book or to replace a photo already in your book.
Starting out your images are already placed for you. If you would like to change the photos placement, you can drag your photo from one placement to another by clicking and holding your mouse on the photo, then dragging to the new placement.
If you dislike how the images were placed, and want to start from scratch, click on the Photos button in the bottom right hand corner of the screen, find the button that says Clear Placed Photos and it will clear all placed photos in your photo book.
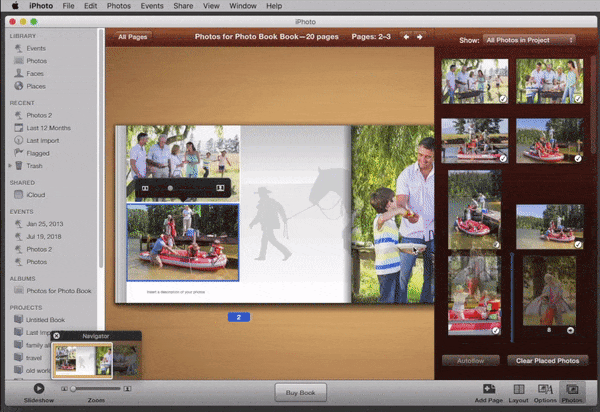
5. Adjusting Photos
Starting out your images are already placed for you. If you would like to change the photos placement, you can drag your photo from one placement to another by clicking and dragging with your mouse to the new placement. If you drag a photo where another photo is already placed, it will switch the photos. If you drag a photo off of the book to the wood background, it will remove the photo from the spread (you can also click on the photo and press the Delete button to remove photos from your layout).
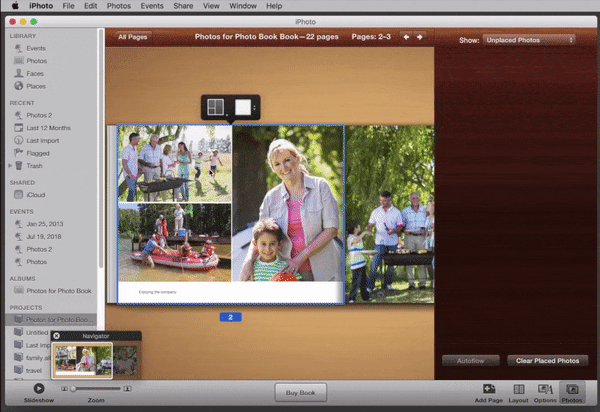
6. Cropping Photos
When you place a photo, it might be cutting off a part of the image you wanted to show. You can click and drag the photo around in the box to move it the proper position, and also zoom in and out with the slider in the pop up dialog box.
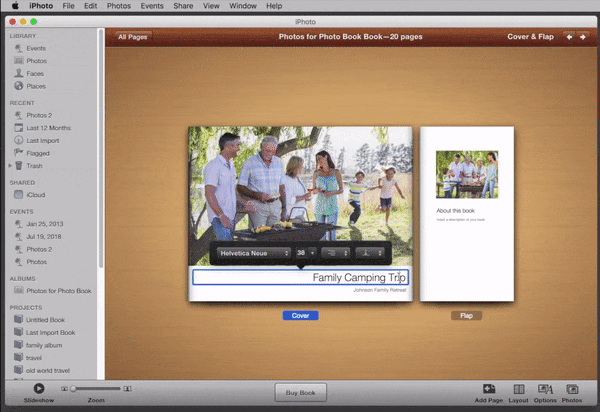
7. Insert your own text
Most themes contain text, at minimum text on the cover of the book. Click on the text to begin editing it. You want to select the placeholder text and delete it, and then type in your own custom text where necessary. When inserting text you also get options for the font, size, weight, and other options for the text. Select the text by highlighting it with your mouse, and then start changing your options, or else they will not display any changes.
To the bottom right hand corner there is also an option for Book Settings, in here you can choose a few options like whether you would like the Apple logo to appear at the end of the book, or if you want to include page numbers.

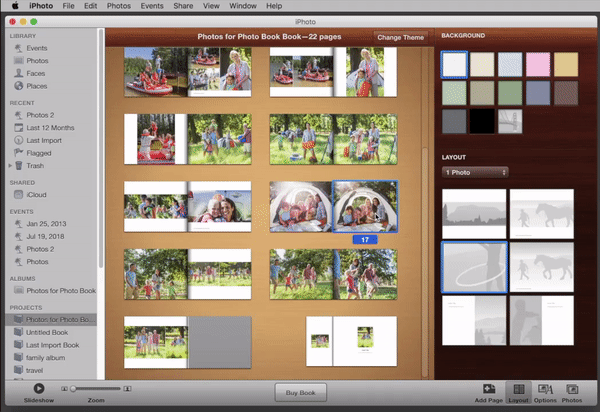
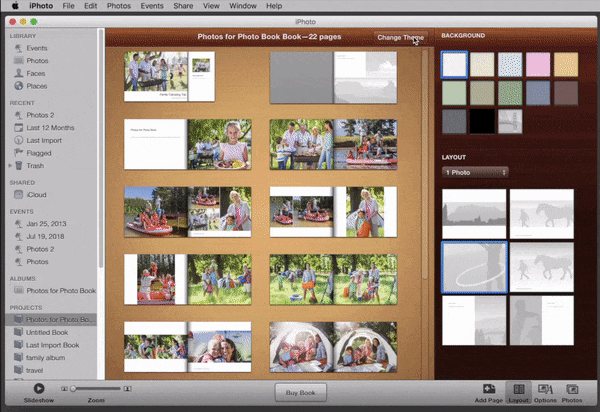
8. Change your Layout
You can also change the layout of every page of your book. At the bottom right hand corner, click the Layout button. This brings up you layout options for the page selected, as well as background color options. Layouts are ordered by the number of images you can place on the layout, and when one is selected it will continue to use the images you already had placed on the page.
To change background colors, select a color from the options above (you can even use a photo as a background)
9. Adding Pages
All books generally start out the same, as 20 page books with a front cover and back cover with dust jackets (if you selected a lot of photos to begin your book, you may have been asked to add extra pages to fit all of your photos). If you decide you need a few extra pages, in the bottom right hand corner has a Add Page option. This will add one extra page every time it's clicked, and it adds it after the page that is currently selected. To make it easy, select a page in the area you want your new pages and then start adding pages.
10. Re-organize your Pages
You can also easily reorganize the pages in your book. Click on the page you would like to move, and drag the page to your desired placement.
11. Change your Theme
You can even change the whole theme of your book if you like while making the book. This option comes with a warning: it will change the layout and placement of photos in your book, and potentially removes text added into your photo book. If you've put a decent amount of work in your book, I would think twice before converting it. To change the theme, click on the Change Theme button in the overview section of the photo book. It will take you back to the screen you started with, and you'll be able to change both the theme and the size of the book. Select your new option and click on the Apply button.
12. Exporting your Photo Book
Once you've finished your book, it's time to order. Apple has ceased production of all print products wince September 30th, 2018. Before that, they ceased printing iPhoto photo books in 2015. So while you can no longer print with Apple, you can print with Presto Photo. You'll need to get the PDF file of the photo book, which you have two ways to do so:
- Hold the Control key then Click on the orange wood background of iPhoto® to bring up an options dialog box. At the bottom is the option to Save Book as PDF.... Select this option, name your PDF file, and remember where you save the file to access later.
- Hold the Option key and click on the Buy Book button in the bottom middle of the iPhoto® window. Name your PDF file and remember where you save it to access later.
Once that's done, you're ready to print! From all testing we've done on newly upgraded macOS devices (10.14 Mojave OS), iPhoto® seems unchanged in it's functions and operations, but you can't order from Apple. You still can make an amazing looking photo book and order through a third party printing provider. Presto Photo has been printing photo book made in iPhoto® since 2006, and still does for thousands of customers today.