
Re-Uploading Your Project
Need to re-upload your project? Follow these steps to get the perfect results!
Re-uploading your project after edits
Exporting your Project
The instructions on this page are intended for users who need to re-upload their project after making changes. We have listed the most commonly used programs below. If you have any specific questions, feel free to Email Us with the program you are using and any questions you may have.
Exporting your project from the PrestoPhoto App
To get started:
- Open your original project
- Make changes to fix concerns in your book
- "Buy" your Project
- Carefully review your Layout Preview to verify that everything looks correct and is within the crop guides.
- Email Us to let us know you have updated your file, we will confirm these changes with you in your order.
To purchase your project, click on the Buy Now button in the top right hand corner of the window. You project will then be uploaded to the website, and will show you all of the available purchase options for your project. You can continue editing your book by clicking Edit.
The video contains no sound, and is for visual reference only
Exporting your project from the PrestoPhoto Online Designer
To get started:
If you have already placed your order please email us if your order is not yet in production, we will provide a direct link to make changes, from there you will start at step 4 below. PLEASE NOTE: If your order is already in production we cannot make changes or cancel your order.
- Open "My Projects"
- Find the current version of your project
- Open your project by clicking the edit icon:
- Make necessary edits
- Click "Buy Now"
- Carefully review your Layout Preview to verify that everything looks correct and is within the crop guides.
- Email Us to let us know you have updated your file, we will confirm these changes with you in your order.
Exporting your project from Apple Pages
To get started:
- Open your project in Apple Pages
- Make necessary edits
- Export your PDF by going to File> Export to > PDF… You will be prompted to choose your Image Quality, use 'Best', and save a PDF to your local computer.
- Upload your PDF to the link provided by our support team
- If you have not received a direct link you can re-upload by going to "My projects"
- Open the most recent upload of your project
- Click the edit icon:
- Go back to step 1 "Upload"
- Click the Upload New...button
- Upload as normal being sure to carefully review your Layout Preview
- Click "Buy Now" Then email us letting us know the files have been re-uploaded.
Exporting your project from Microsoft PowerPoint
To get started:
- In the top left, select File > Export
- Select “PDF” from the dropdown menu
- Name your file
- Click “Export” and you’re done!
- Upload your PDF to the link provided by our support team
- If you have not received a direct link you can re-upload by going to "My projects"
- Open the most recent upload of your project
- Click the edit icon:
- Go back to step 1 "Upload"
- Click the Upload New...button
- Upload as normal being sure to carefully review your Layout Preview
- Click "Buy Now" Then email us letting us know the files have been re-uploaded.
Exporting your project from Microsoft Word
To get started:
- File > Save As
- In the dropdown menu, select “PDF”
- Mark the checkbox that says “Best For Printing”
- Click “Export”
- A pop-up window will appear asking if you’d like to continue printing even though your page size is different from your print size. Click “Continue”
- Another pop-up window will appear asking if you’d like to continue due to small margins. Click “Yes”
- Upload your PDF to the link provided by our support team
- If you have not received a direct link you can re-upload by going to "My projects"
- Open the most recent upload of your project
- Click the edit icon:
- Go back to step 1 "Upload"
- Click the Upload New...button
- Upload as normal being sure to carefully review your Layout Preview
- Click "Buy Now" Then email us letting us know the files have been re-uploaded.
Exporting your project from Microsoft Publisher
To get started:
- File > Save As
- In the dropdown menu, select “PDF”
- Make sure the "Optimize for:" section says “High quality printing”
- Click “Save”
- Upload your PDF to the link provided by our support team
- If you have not received a direct link you can re-upload by going to "My projects"
- Open the most recent upload of your project
- Click the edit icon:
- Go back to step 1 "Upload"
- Click the Upload New...button
- Upload as normal being sure to carefully review your Layout Preview
- Click "Buy Now" Then email us letting us know the files have been re-uploaded.
Exporting your project from Adobe InDesign
To get started:
- Click “File” > “Export”
- Name your file and choose where you’d like to save it
- From the drop down menu at the bottom select “Adobe PDF (Print)”
- Once you’ve done that, click “Save” at the bottom
- Upload your PDF to the link provided by our support team
- If you have not received a direct link you can re-upload by going to "My projects"
- Open the most recent upload of your project
- Click the edit icon:
- Go back to step 1 "Upload"
- Click the Upload New...button
- Upload as normal being sure to carefully review your Layout Preview
- Click "Buy Now" Then email us letting us know the files have been re-uploaded.
Exporting your project from Adobe Photoshop
To get started:
- Follow the exporting steps on our Photoshop Help page, then follow the steps below
- Upload your PDF to the link provided by our support team
- If you have not received a direct link you can re-upload by going to "My projects"
- Open the most recent upload of your project
- Click the edit icon:
- Go back to step 1 "Upload"
- Click the Upload New...button
- Upload as normal being sure to carefully review your Layout Preview
- Click "Buy Now" Then email us letting us know the files have been re-uploaded.
Exporting your project from Adobe Lightroom
To get started:
- Follow the exporting steps on our Adobe Lightroom page, then follow the steps below
- Upload your PDF to the link provided by our support team
- If you have not received a direct link you can re-upload by going to "My projects"
- Open the most recent upload of your project
- Click the edit icon:
- Go back to step 1 "Upload"
- Click the Upload New...button
- Upload as normal being sure to carefully review your Layout Preview
- Click "Buy Now" Then email us letting us know the files have been re-uploaded.
Exporting your project from Canva
To get started:
- In the top blue navigation bar, select “Download”
- Ensure the following selections are made:
- File Type: PDF - Print (recommended)
- Toggle the “All Pages” option.
- De-select the “Crop Marks and Bleed” option.
- Click “Download”
- Upload your PDF to the link provided by our support team
- If you have not received a direct link you can re-upload by going to "My projects"
- Open the most recent upload of your project
- Click the edit icon:
- Go back to step 1 "Upload"
- Click the Upload New...button
- Upload as normal being sure to carefully review your Layout Preview
- Click "Buy Now" Then email us letting us know the files have been re-uploaded.
Exporting your project from Affinity Publisher
To get started:
- When exporting your final PDF for print, go to File -> Export, select PDF from the file options above.
- Select PDF (for print) and for the dropdown for Area, select All Pages instead of 'All Spreads' which is initially selected. (The 'All Spreads' option exports a 2 page spread as a single page in the PDF, and we cannot process those PDF's for print.)
- Upload your PDF to the link provided by our support team
- If you have not received a direct link you can re-upload by going to "My projects"
- Open the most recent upload of your project
- Click the edit icon:
- Go back to step 1 "Upload"
- Click the Upload New...button
- Upload as normal being sure to carefully review your Layout Preview
- Click "Buy Now" Then email us letting us know the files have been re-uploaded.
WARNING: The programs below have been entirely disabled by Apple, projects created in these programs may not have the option to make revisions. Please note: If you are using macOS 10.15 "Catalina" This update no longer supports Aperture and iPhoto, so by updating you will lose access to past projects and will be unable to make edits. We suggest you back up all of your photo book projects before updating.
Exporting your project from iPhoto
To get started:
- Make edits to your book in iPhoto
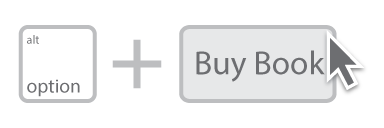
- In your project, hold the option key and click on the Buy Book option in the bottom middle of the window
or press the control key and click on the orange wood background to select Save Book as PDF... from the options

- Upload your PDF to the link provided by our support team
- If you have not received a direct link you can re-upload by going to "My projects"
- Open the most recent upload of your project
- Click the edit icon:
- Go back to step 1 "Upload"
- Click the Upload New...button
- Upload as normal being sure to carefully review your Layout Preview
- Click "Buy Now" Then email us letting us know the files have been re-uploaded.
Please Note: Our system will automatically format your project correctly when it's saved according to the steps above! Please do not alter project size, remove cover pages, or alter any other part of your PDF.
Exporting your project from Apple Aperture
To get started:
- Make edits to your book in Aperture
- Select Print from the upper right of the page
- Choose Save as PDF from the drop down menu at the bottom left
- Name your file and click Save
- Upload your PDF to the link provided by our support team
- If you have not received a direct link you can re-upload by going to "My projects"
- Open the most recent upload of your project
- Click the edit icon:
- Go back to step 1 "Upload"
- Click the Upload New...button
- Upload as normal being sure to carefully review your Layout Preview
- Click "Buy Now" Then email us letting us know the files have been re-uploaded.