
Online Book Designer
A step by step walkthrough of creating a photo book with our Online Designer
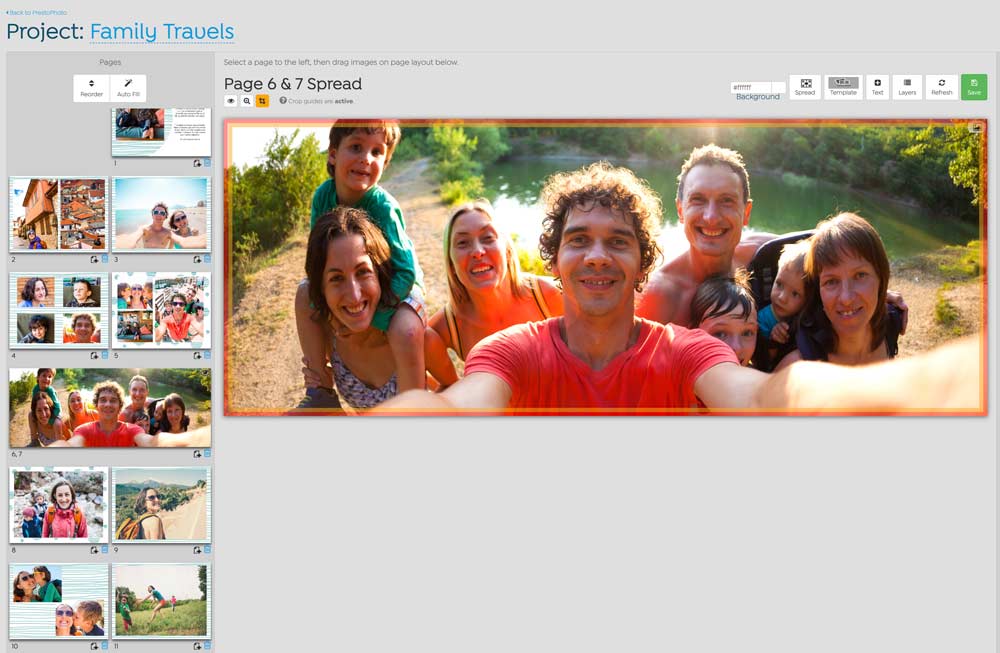
Work Page
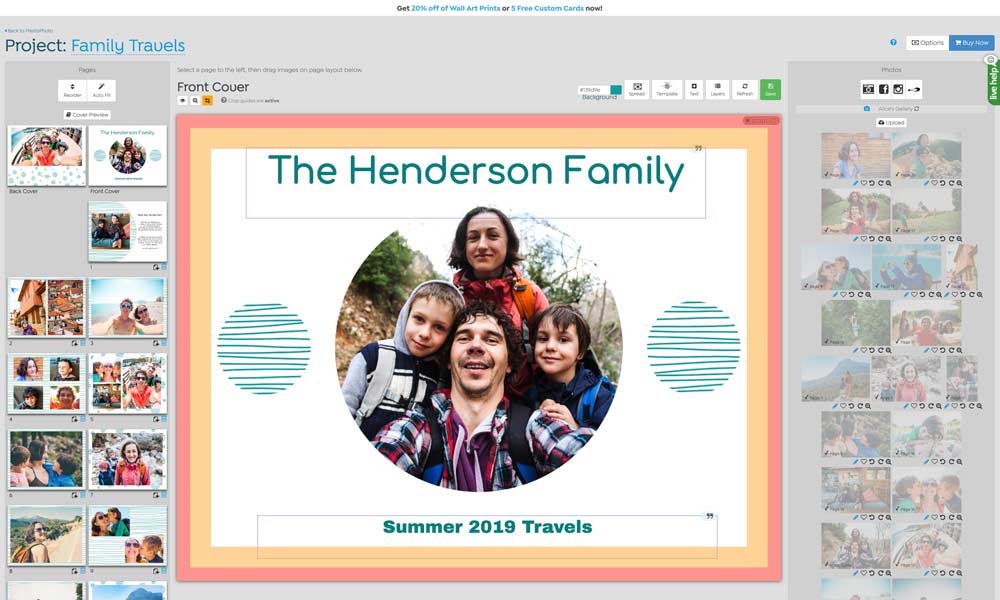
The first thing you notice when you open a project in the Designer is the large blank page in the middle of everything. When a page is selected in the Designer, it becomes the main work page in the center of the Designer. This represents the page you are actively working on.

Above the main work page to the left is a helpful navigation note that indicates the page you are currently working on, as well as provides a few editing tools:
- Print Preview: A quick preview of your flattened page.
- Zoom: This feature allows the work page to fill the full screen.
- Show Crop Guides: These display where your project may be trimmed in production. More information on crop guides here.
Crop Guides
Crop Guides are shown in the designing process, so that while creating a project the safe zone for content is clearly displayed. Any content placed under the red and orange crop guides will be at risk of being trimmed.
Red: The red guides indicate the estimated crop zone for our standard sized photo books. We estimate the trim can vary from ½ way through the red guide, through the entire red guide.
Orange: Cropping for our minibook due to the small size is a bit more intense than the standard books we offer. We suggest extending the content to roughly .5” to avoid unwanted cropping
Please note: The crop guides will not print upon producing a project created in the Designer. If you would like to view your project without the crop guides interfering in the design, simply click the Show Crop Guides button to toggle them on and off, but it's best to cut them back on so you don't design your book without crop guides in mind.
Back to Help TopicsPhoto Panel
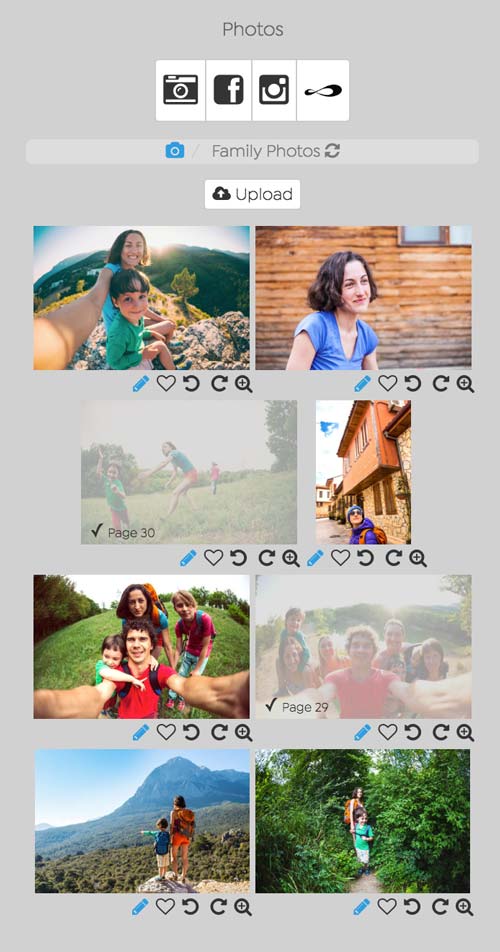
The right side of the Designer is reserved for the Photo Panel. Here you can access all of your galleries and the images within them! By clicking the blue camera icon, you can view a list of the galleries within your PrestoPhoto account. Additionally, you are able to upload images into new and existing galleries by selecting the Upload button.
Images that have been used in your project will have a ✓ and the page number the photo appears on in the bottom left corner of the image, and the image is partially grayed. Images that appear at full opacity have yet to be used within your project.
Back to Help TopicsPhoto Sources
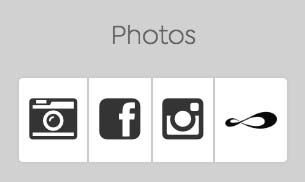
Uploaded Photos - Photos in this category are already uploaded to PrestoPhoto, you also have access to upload more photos to PrestoPhoto
Facebook - Access photos from your linked Facebook Account for your Online Designer Projects
Instagram - Access photos from your linked Instagram Account for your Online Designer Projects
![]() Zenfolio - Access photos from your linked Zenfolio account for your Online Designer Projects
Zenfolio - Access photos from your linked Zenfolio account for your Online Designer Projects
Adding Photos to a Project Page
Once you have images uploaded and a template set on your page, you can add photos to your project page:
- Select the page you would like to apply an image to from the Pages Panel to the left within the Designer
- Once the page is chosen, select the preferred photo gallery from the Photo Panel to the left
- All of the images within the gallery will display on the left panel and you must locate the photo you want to apply to the project
- Click directly on the photo and while holding your cursor down, drag the image to the page (should say Drag and Drop Image Here where the image can be placed)
- Release the cursor and the image you have selected with apply the page
This works for all project types on the site (Wall Art, Coffee Mugs, Cards, Prints, etc).
Back to Help TopicsDeleting Photos from a Project Page
To remove a photo after it has been placed, hover on the top right hand corner of the photo, and click on the Delete icon. You will be asked to confirm deleting the photo off of the current page.
This works for all project types on the site (Wall Art, Coffee Mugs, Cards, Prints, etc).
Back to Help TopicsReplace a Photo on a Project Page
To replace a photo, just click and hold on a new photo in your photo tray and drag it to the picture you want to replace.
This works for all project types on the site (Wall Art, Coffee Mugs, Cards, Prints, etc).
Back to Help TopicsUpload

Uploading images within the Online Designer is easy with our Upload button! Select the button located at the top of the right panel in the Designer and you will be redirected to the Upload options below.
How to Upload Images in the Designer
- Select the Upload button at the top of the right panel in the Designer.
- Click the Choose Files button and locate the image you would like to upload.
- Once selected, click Open and the image will begin upload.
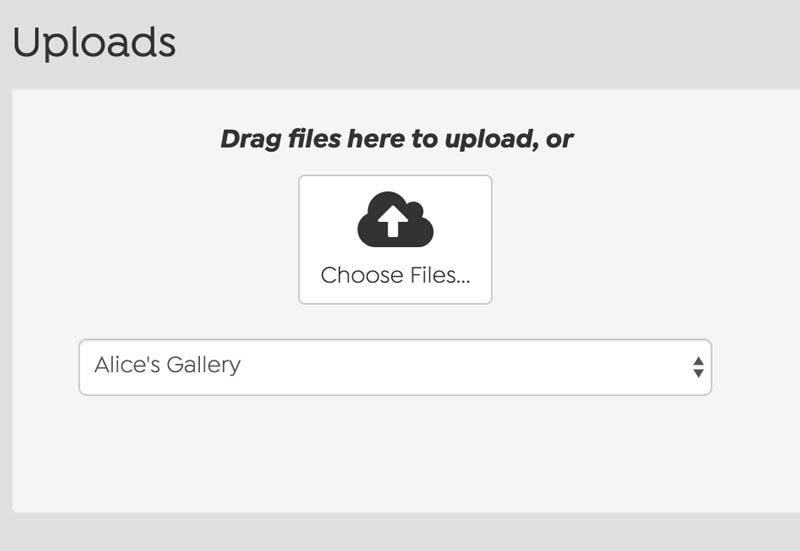
We offer two methods of uploading into the Designer.
- You can drag your images from the desktop into the indicated light gray space and directly upload into the Designer.
- There is also the option of uploading multiple images at once by going to Choose File and selecting the images by file name for upload.
Upload photos from Apple Photos
To upload photos from Apple Photos, click on the Upload button in the Photos panel, and in the Finder File window that pops up, scroll down to
Photo Options
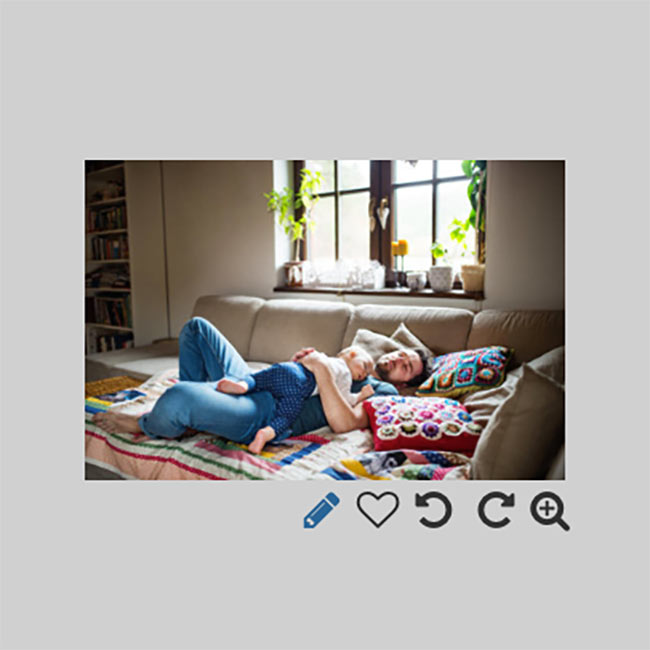
In order as displayed from left to right:
- Takes to the selected photo's Edit page where you can change the image's title, description, replace with a new version of the photo, rotate and flip the image, resize the photo, change the gallery the photo is associated with, and the security options for the photo
- Favorites the photo
- Rotates the image left 90° degrees, counter-clockwise
- Rotates the image right 90° degrees, clockwise
- Hover over this icon for a larger preview of the image
Back to Help TopicsPages Panel
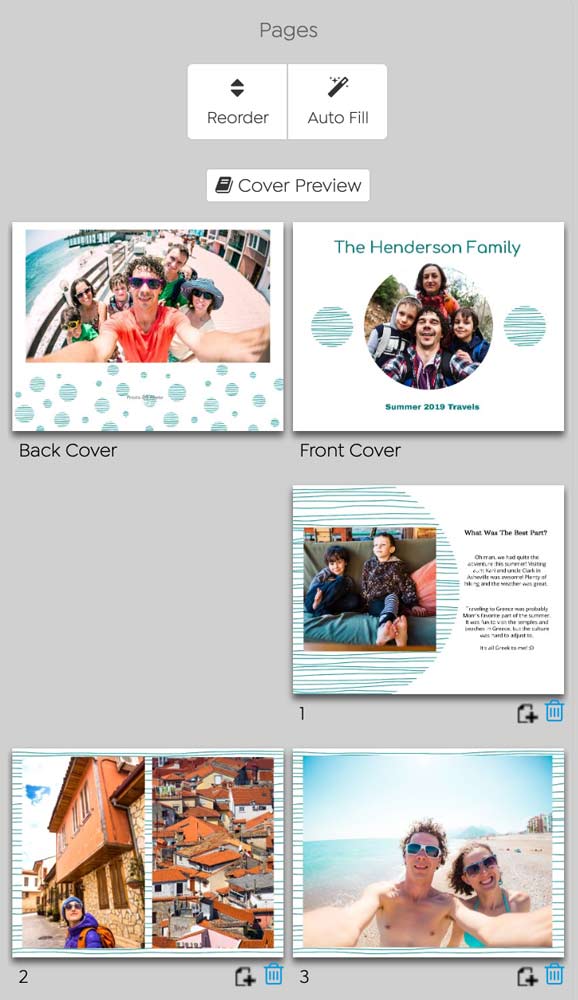
On the left of the main work is your Pages panel. Here you can see the layout of your project, including the order of pages. Thumbnails of the interior pages will also display in the left panel.
Back to Help TopicsAdd and Delete Pages
To add a single page, click the ![]() Add Page button below the page you wish to add more pages after. The new page will appear after that page.
Add Page button below the page you wish to add more pages after. The new page will appear after that page.
To delete a single page, click the Trash button below the page you wish to delete. This cannot be undone, so be sure before you delete a page.
Back to Help TopicsTo add and delete multiple pages quickly, access the Reorder panel. At the bottom of all of the pages (you may have to scroll), you'll see two buttons: Add Multiple Pages and Delete Multiple Pages. Follow the prompts to add or delete multiple pages from your project, and again remember that deleted pages cannot be recovered.
Back to Help TopicsReorder
Switch things up by clicking the Reorder button! You can add or delete multiple pages within your project as well as reorder the pages with simply clicking and dragging the page locations.
Back to Help TopicsAutofill
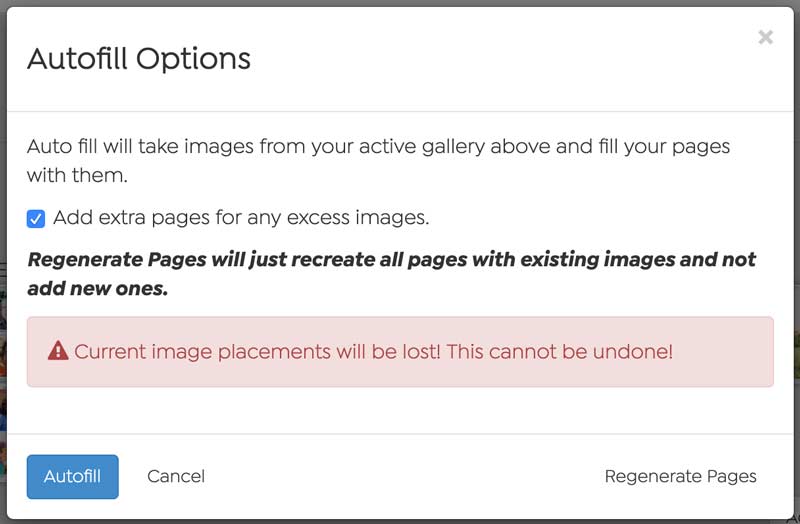
The Autofill option is perfect for quickly putting a book together. To utilize the Autofill option, you will want to ensure that the gallery that you'd like to utilize is open in the Photo Panel, prior to selecting the Autofill button
Back to Help TopicsCover Preview

When the Cover Preview button is selected you will be redirected to a page where you can review the covers of your project. You can also enter in spine text, change the background color, and select the spine text font you'd like to use.
How to Enter Spine Text:
- Click the Cover Preview button on the upper left panel and you will be redirected to the edit page.
- Enter your spine text in the desired location on the spine.
- To apply the spine text you have entered, click the Save button at the bottom of the screen.
Editing Tools

At the top right of the main work page, you will see the Toolbar. Each tool serves an important purpose when designing your project. You can learn about each below.
Back to Help TopicsBackground

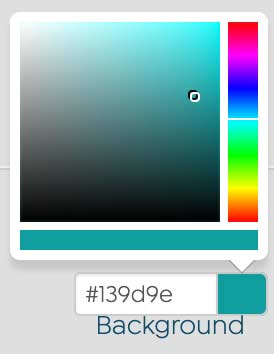
The Background button in the Designer allows you to adjust the background color of any page in your project by selecting a point on the color spectrum. Additionally, you can enter a custom Hex color code if you've got a specific color in mind.
How to Apply a New Background Color:
- Select the page you would like to change the background color on.
- In the options above the work page, click the Background button.
- Choose from the color picker that pops up or enter the Hex color code in the text box to alter the page color.
 Spread
Selecting the ![]() Spread button will change the page you're on into a 2-page spread. This means that the content you place on this spread will be printed over 2 pages in your final project. Note: You will want to keep in mind the center of the two pages, as for all regular books, this area will have some content under the crop guides.
Spread button will change the page you're on into a 2-page spread. This means that the content you place on this spread will be printed over 2 pages in your final project. Note: You will want to keep in mind the center of the two pages, as for all regular books, this area will have some content under the crop guides.
How to Create a Two Page Spread:
- Once you have a page selected, note the toolbar above the work page.
- Select the Spread button and a pop up will appear asking if you want to make the page a two page spread.
- When you click OK, the two pages will merge into one 2 page spread in your project.
If you would like to revert to single pages again, simply click the Spread button once more.
Back to Help Topics Templates
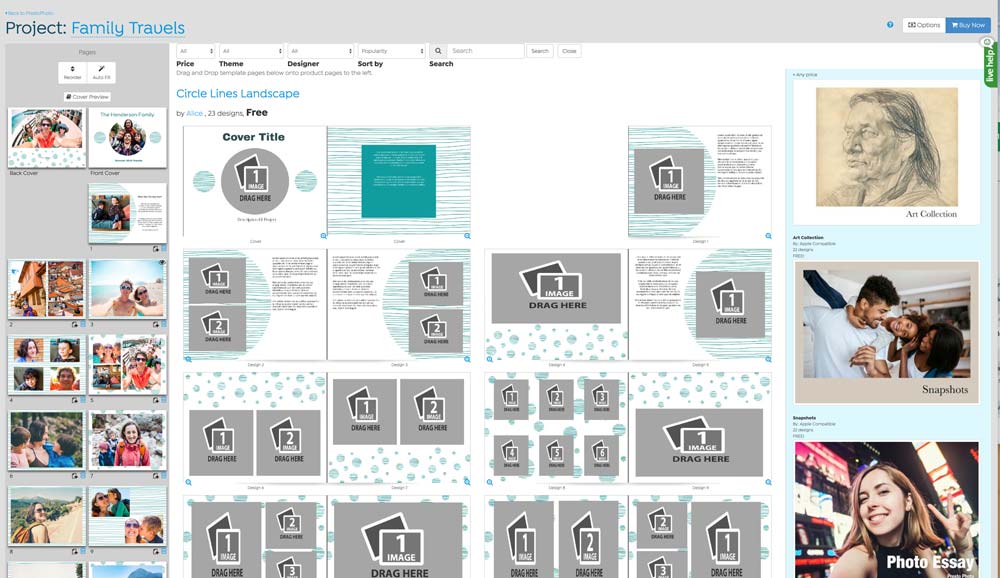
The Template tool redirects you to the page where you can browse, select and apply templates to your pages. On the right hand side of this tool you'll see template groups that you can browse. You can also use the search bar at the top of the tool to narrow your search. Once you've found a template you'd like to apply, simply drag and drop it onto your pages in the left panel and you're good to go!
How to Apply a Template:
- With your project open in the Designer, select the Template button in the options above the workpage.
- Once clicked, you will be redirected to a page displaying the full Photo Collage template we offer as well as other templates right panel.
- Click the template you would like to apply and drag it to the pages in the left panel that should be highlighted blue.
With our templates you can mix and match, so please feel free to explore all the templates available!
Back to Help TopicsText
The Text tool will place a text box on the page you're currently working on. Once the text box is placed, you can add and edit text as well as move and resize the box itself.
How to Apply Text:
- To add text to your project, begin by clicking the Text button in the toolbar above your work page.
- A text box will appear that you can adjust and position on your page.
- Click into the textbox to begin typing your text, note the text editing options to adjust the font, size, kerning and many more options!
Move Text Box
To move the text box around, hover over the text box's handle (the one you are moving should be colored yellow), and you'll click the background and move the textbox to your desired placement.
Back to Help TopicsChange Text Color
Select the text that you want to change the color of, and select the ![]() icon above and choose the color you would like your text to be.
icon above and choose the color you would like your text to be.
Change Text Size
Select the text you want to change the size, go to the Size options in the text options above, and select the size of type you want. If you make the text larger than the size of the text box, just increase the size of the text box to fit.
Back to Help TopicsDelete Text Box
If you need to delete a text box from your project, select the text box handle (should be yellow), and a trash can icon appears. Click the trash icon and you will be prompted to confirm deleting your text box. Once you delete your text box it can not be undone, so be positive you are ready to delete your text box.
Back to Help TopicsLayers
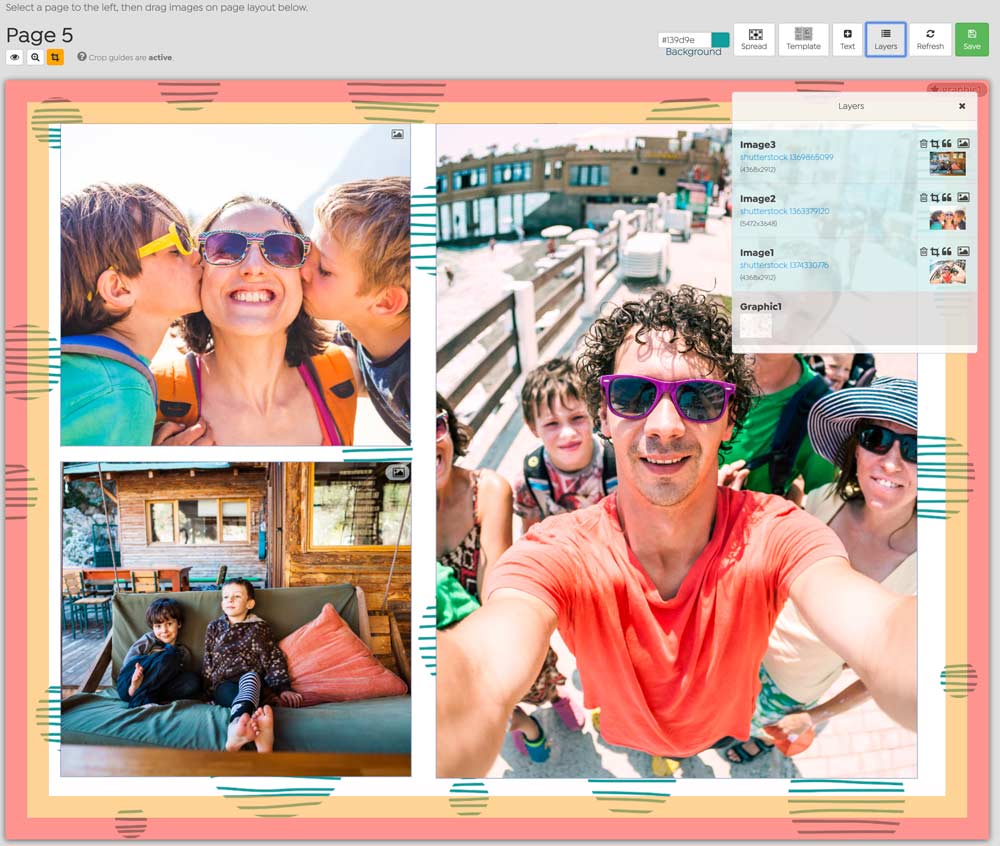
The Layers tool allows you to review a list of all of the content on the current page. You will also be able to review the image resolution, add captions and delete elements in this tool.
How to Check Your Image Resolution:
- Select the page you would like to check for resolution issues
- In the upper right of the main work page, select the Layers button
- Once selected you will see a preview of all the images and warnings if the resolution is too low.
Refresh

Made a change that’s not reflecting on the work page? Click the Refresh button! Your page will be prompted to reload and all caching issues in the Designer should be cleared.
Back to Help TopicsSave

Although the Designer does auto save, it’s important to also remember to click the Save button when editing a project from time to time. If you are about to exit out of your project, that's the best time to hit Save.
Back to Help TopicsOptions

When the Options button is selected, you will be redirected to the page where the project can be made available for purchase. Here you can set your project up for purchase outside the account used to create the project.

The Availability of the project refers to if you have set the project up for sale. You can indicate this by selecting the List product in the webstore option and clicking the Save button in the bottom of the page.
For more information, check out our selling products help page.
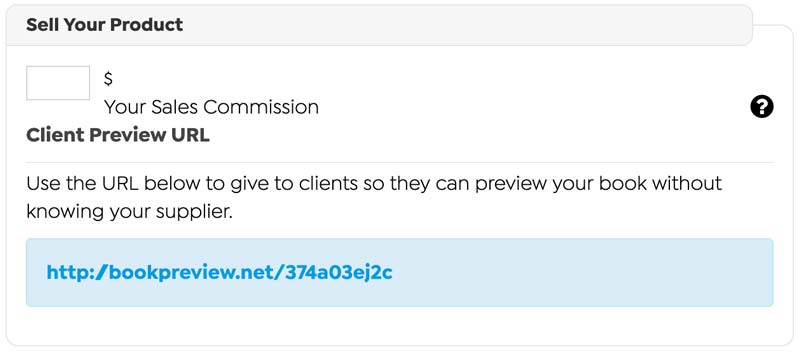
Under the Sell Your Product option, you can set the commissions earned when someone purchases your project. The Client Preview link is also available at this point.
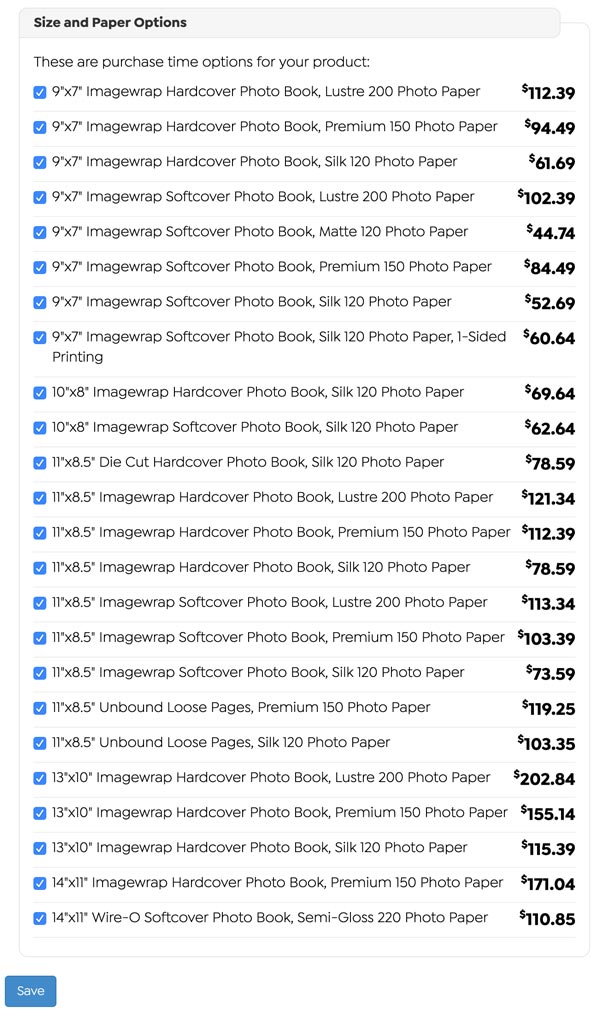
The section that displays the Size and Paper Options allows you to select the products you would like your project to be available for purchase. This tool will permit you control of what product your project in produced as. The Save button at the bottom of the page, saves the changes made to the purchasing options.
Back to Help TopicsBuy Now

The Buy Now button in the upper right of the Designer, when selected will lead you to your books checkout page. Here you can select the size and paper type of your project, as well as adding the quantity desired for your order.
Back to Help Topics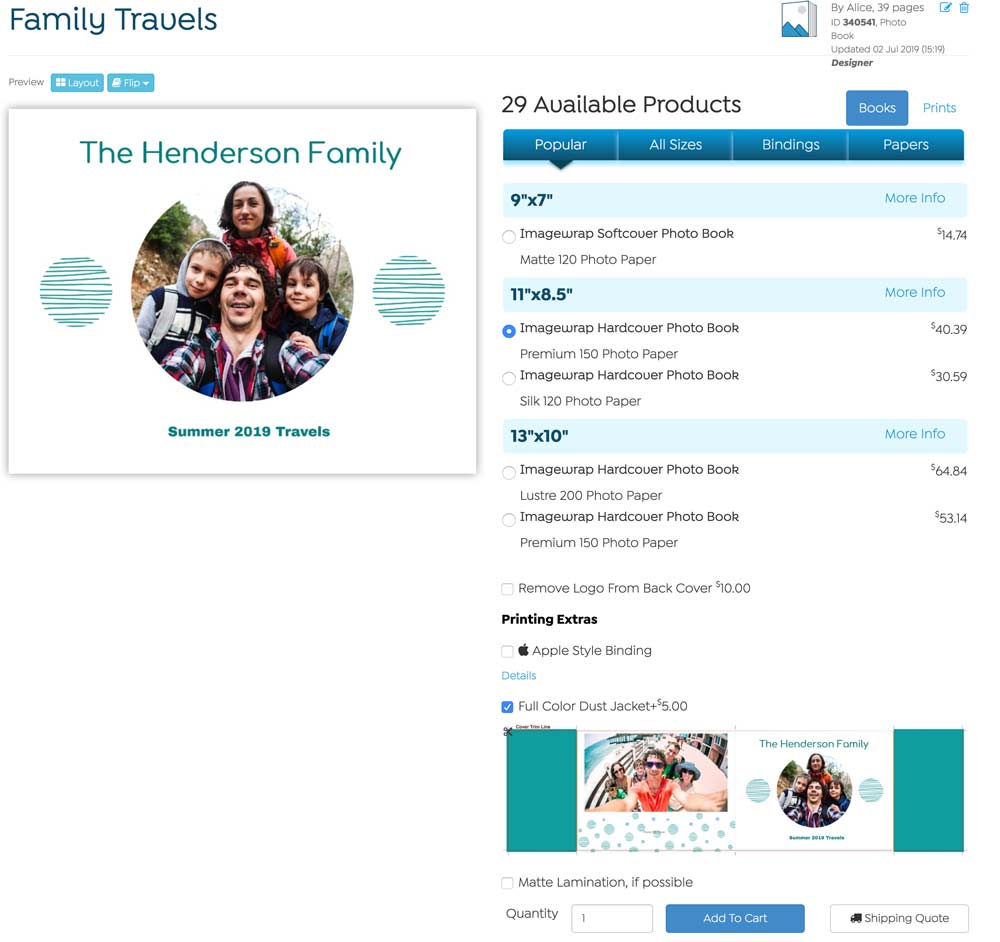
You can also preview the interior of your project before placing an order. The Layout Preview Layout will allow you to review the production preview of your project prior to purchase.
Comments
Cover picture
other paper choice than satin?
No delete or undo button
Re: No delete or undo button
While there is no undo button, there are a few options to either Delete a Photo from the Page or Replace a photo that's already been placed with the online designer. See how-to videos with more information how in the links above.
Warm Regards,
Tim from PrestoPhoto
Adding Pages
Re: Adding Pages
Yes, that is still an option! From within your Online Designer project, click the REORDER button in the left hand pages panel. After doing that, click the ADD MULTIPLE PAGES button and enter how many pages you'd like to add!
If you have any other questions, please feel free to reach out via email or Live Chat!
Warm Regards,
MJ
deleting multiple pages at once
Thanks!