Adobe Lightroom Legacy Photo Books
How to create and print Adobe Lightroom Books using the older BOOKS tab
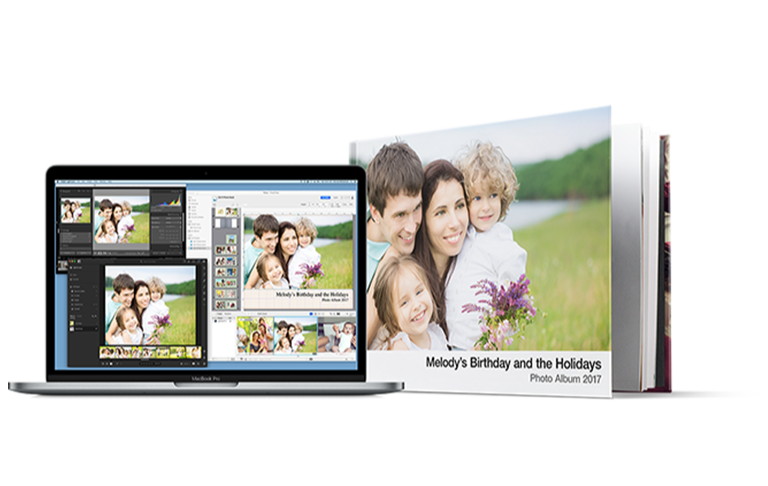
Adobe Lightroom Classic® Legacy PDF Book Printing
With great prices and options it's easy to see why PrestoPhoto is the perfect fit for your Lightroom Classic book! Just upload, print, and enjoy.
Presto Book Workflow for macOS
Create All New Photo Books with
PrestoPhoto App & Lightroom Integration
Before you proceed, please learn about the Presto Workflow. Since Adobe has not updated the Lightroom Classic BOOKS tab in years, PrestoPhoto has created a modern solution to allow creating of photo books using images from Adobe Lightroom and Lightroom Classic.
RECOMMENDED The PrestoPhoto app uses Apple Photos plugin technology and the Adobe Lightroom Cloud API, to provide an all new seamless drag-and-drop photo book creation like never before! Mix and match your iCloud library (such as images from your phone) with your Lightroom Cloud Albums to create books in dozens of new sizes, bindings and papers ... all at terrific prices.
Works with Lightroom Classic, with a few caveats and work-arounds. See our LrC video for details.
And one more thing... 1-click upload & order at PrestoPhoto, or ... it includes hi-rez export without branding so you can share, archive, and print anywhere you like ... for FREE. No strings attached.
 Learn More
Help Page
Learn More
Help Page
Creating Lightroom Classic Photo Books via Legacy PDF Workflow
How to Make Ready Your PDF
First things first: you have to save your work! Follow these steps in Lightroom to create a complete book and enjoy PrestoPhoto's book printing and great everyday pricing!
- Complete your book in Lightroom using the correct settings (found in the FAQs below)
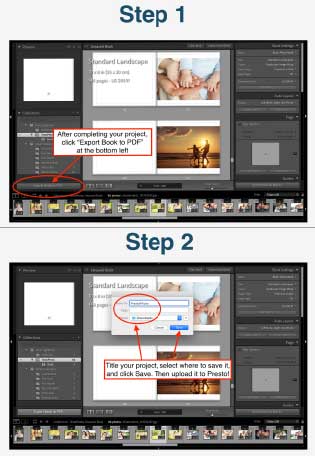
- Select the "Export to PDF" button from the bottom right of the page » Name your file and click Save
- Upload the PDF to PrestoPhoto
What If I Save My File In a Different Way?
Not to sound mean, but don't say we didn't warn you! Saving files in different ways can result in very unsatisfactory results and your order might be delayed by going into Customer Check since we want to make sure you have the chance to fix any potential issues that we can catch!A Few More Notes of Caution
- After you've saved your project, preview it before uploading. This will let you check for typos or other errors before uploading the completed file
- Make sure the settings listed on the right side of your project in Lightroom are correct
Here's What's Great About Lightroom
With most PDF creation programs, it's really easy to let text or important content slip under the crop guides. Lightroom is a little (a lot) different though. They have automically built-in "no-go" zones that don't allow any content other than the very outter edges of your images. This means WAY less work for you (and us)! Because of this, when creating your project you mostly need to take note of what part of your image is in that "no-go" zone to make sure nothing important is cut out.
Let's Talk About Covers
Once you've exported your Lightroom PDF, you'll end up with two files: the cover and the interior. Your cover will be a full wrap cover which means that the front and back cover are one piece. As we said before, Lightroom is pretty awesome with saving your text from being trimmed, however because of the different crop guide sizes more or less of your cover images can be trimmed. Once you've uploaded You’ll be shown a preview of the full cover including crop guides in Step 2 but keep in mind these crop guides:- The red crop guide indicates a .25" for softcovers. Softcovers have approximately 1/8” trimmed but cropping and bleed is recommended at .25" to account for shifting that can occur.
- The red and pink crop guides combined indicate the trim and fold guides for hardcovers. Hardcovers require a wider, roughly ½” bleed in addition to the .25", as the cover image is wrapped around a board (very similar to wrapping a present). We do recommend adding an additional .25" as a saftey measure, as content exactly .75” from the edge will be directly against the edge of the cover. This will make a total 1" margin for hardcovers.
And Now for Interiors
The automatic trim area for standard size interiors is approximately 1/8 inch on all sides, however we cannot guarantee any content that is within a full .25” from each edge of the page due to shifting that can occur in production. This is .25" is referred to as the "caution area" and represented by the red crop guide. It is something we are unable to change or adjust for a specific book as trim occurs during manufacturing to give your book a polished, finished look. In order to produce the best results possible, all vital content should be kept within the caution area with all non-vital content fully extended to the edge of the page. This ensures that no vital content is trimmed and there is no unwanted solid border remaining around the page.Even if you add page numbers to your Lightroom project, because of the safety box in Lightroom, any text and page numbers should be safe. As always though, keep an eye out for image content that is (or isn't) falling under the trim guide that shouldn't (or should) be.
Be sure that spreads are separated and not uploaded as one continuous spread since this will skew the size of the book and we would not be able to print your book. This means that you need to have individual pages, not spreads, being uploaded. During export just make sure that it will be saved out with all of the pages separated. You can certainly have 2 page spreads, just make sure that they are indeed two separate pages!
A Little Help for Images
There is hope if any important elements are under the guides: the super amount of control that Lightroom allows makes it pretty easy to adjust, once you get the hang of it! To get your book lookin' even better, check below for the textual help!- Select the item you'd like to change and then...
- Use the directional options on the image itself to adjust the size
- or
- Increase the amount of padding in the "Cell" box by the needed amount
- Make sure that your cover and interior pages follow our crop and bleed guidelines for the best results!
A Few More FAQs
That will fully depend on your selection prior to exporting. Check out the info below:
- Standard and Large Landscape: 9.5x8, 13x11
- Standard Portrait: 8.5x11, 8x10
- Small and Large Square: 3.5x3.5, 5x5, 8.5x8.5, 10x10, 12x12
The final file output dimensions from these size options are:
- Standard Landscape: 9.63x8.25
- Large Landscape: 12.63x10.88
- Standard Portrait: 7.88x10
- Small Square: 6.88x6.88
- Large Square: 11.88x12
Great question - gold star for you! You can adjust the settings for your project in Book Settings section within the righthand sidebar. I've got your correct settings listed right here:
- Book: PDF
- Size: Whichever option you'd like
- Cover: Whichever option you'd like
- JPEG Quality: 100
- Color Profile: sRGB
- File Resolution: 300ppi
Most of these options will be set by default, but it doesn't hurt to double check!
You sure can. From the Webstore for your book, click on the “Layout” button underneath the cover image. Once this page loads be sure to check the box for “Show Crop Guides” and take into consideration the crop guides for your project size. With most Adobe books this will be the red crop guide. Anything under that guide is subject to being trimmed during production, so be sure to keep any important elements (such as marriage proposals or little Johnny’s eyes) out of the red or say goodbye!
You can add in spine text during your Lightroom book creation, but if you forgot there is hope! If your spine text is not included in your Adobe PDF, we do offer a Spine Text tool after uploading your book that will allow you to add your own! Once you’ve uploaded your book in Step 1, follow the steps below:
- In Step 2 scroll to the box labeled "Cover Text & Colors", just underneath the cover preview.
- Click on the "None" that is next to Spine Text and enter whatever text you'd like in either the Top or Bottom Spine Text boxes. The text will show as a Preview when you click off the editors.
- When you're happy with the text, click "Update Cover" at the bottom of the page and the page will refresh showing your Spine Text on the cover.
- If you're happy with the preview then you're all set! Otherwise, you're free to edit (and edit again) as much as you need! Just remember to click "Update Cover" when you make any changes so that they are saved.
One of the downsides of ultimate customization is...ultimate customization. Because Lightroom exports a full wrap cover there isn't a way for you to change the spine color once the cover is uploaded. However it's not too hard of a fix! Follow the steps below to get your ideal spine color:
- From within your Lightroom project, select the Cover page
- Scroll down to the "Background" box in the bottom of the right sidebar
- Check the "Background Color" box, click on the rectangle of color next to it and select the color you want
- Save the project out using the save steps at the top of the page and visit Step 2, the cover step, for your project
- Under Cover Images click "Upload New Image", select the updated cover file, and click "Update Cover" at the bottom of the page
- The page will refresh with your updated, awesome cover!