
Aperture Printing
We offer turn key book printing directly from Aperture with minimal effort on your part!
Aperture® Photo Books
Apple may have discontinued Aperture printing, but not us. It's easy! Just upload your book and print. Create apple photo books using Aperture!
macOS 10.15 "Catalina" Update Instructions
Before updating to macOS 10.15 "Catalina", please check out our App Upgrade page for information about PrestoPhoto App Version 2.2.0.
This update also no longer supports Aperture and iPhoto, so by updating you will lose access to past projects. We suggest you backup all of your photo book projects before updating.
Apple Aperture Photo Project Ordering
Follow these steps in Aperture® to create a complete book and enjoy PrestoPhoto's great everyday pricing!
- Complete your book in Aperture
- Select Print from the upper right of the page » Choose Save as PDF from the drop down menu at the bottom left » Name your file and click Save
- Upload the PDF to PrestoPhoto and place your order
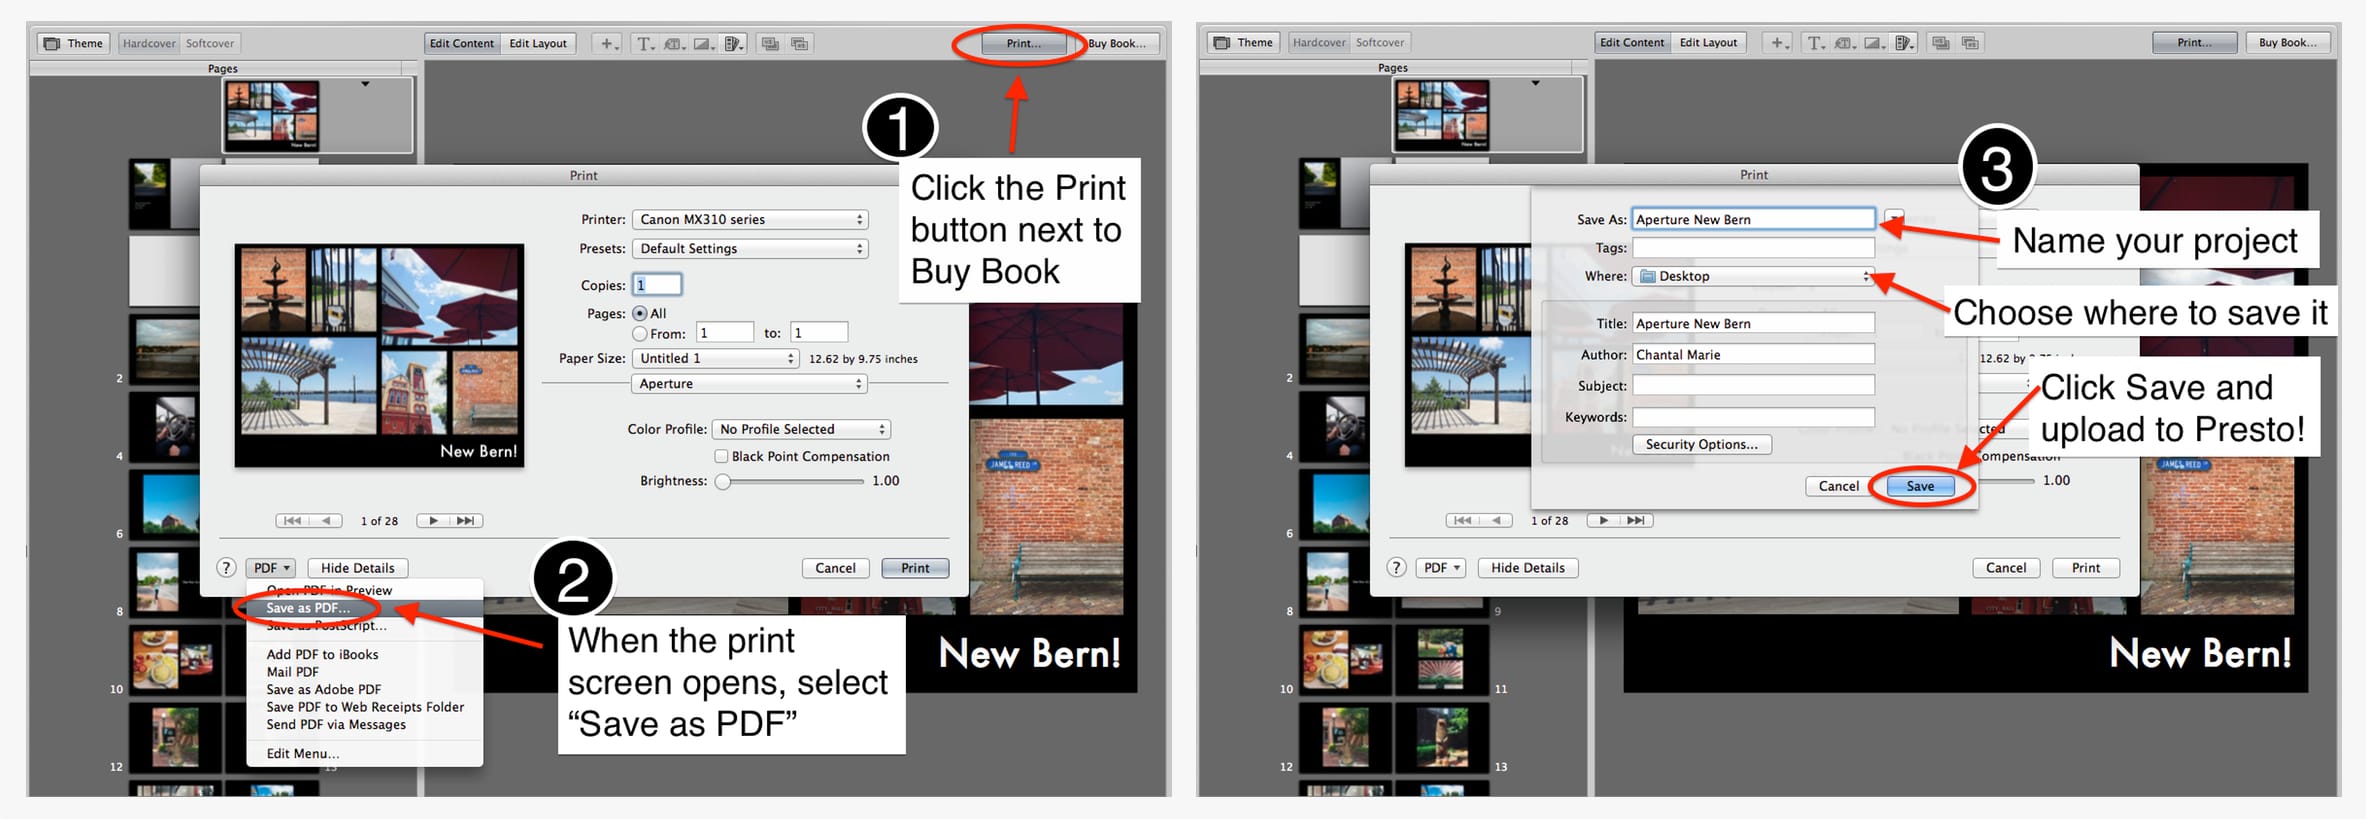
Visual Walkthrough of Saving a PDF in Aperture
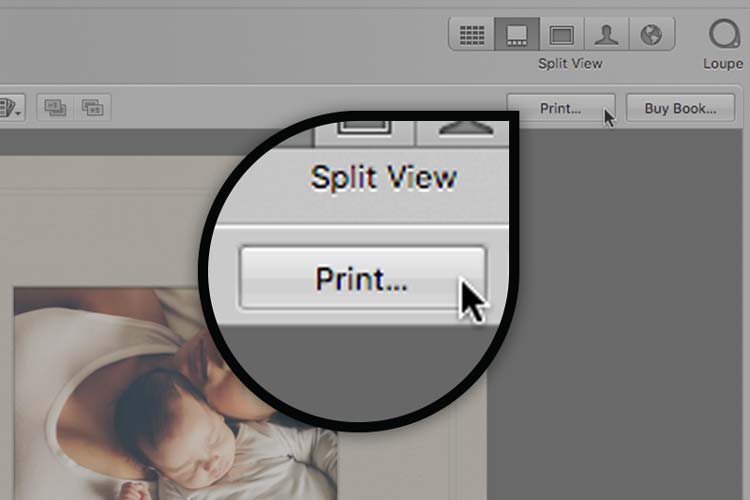
Select Print from the upper right of the page
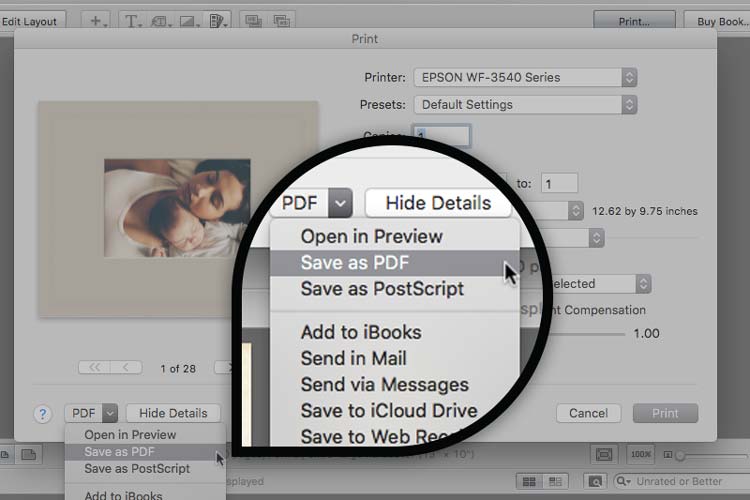
Choose Save as PDF from the drop down menu at the bottom left

Name your file and click Save
Please Note: Our system will automatically format your project correctly when it's saved according to the steps above! Please do not alter project size, remove cover pages, or alter any other part of your PDF.
Apple Compatible Templates
Need to design a book outside of Aperture? Our templates have you covered.
Using these templates, you can design online, download our Apple Pages templates, or design using our new Mac OS app!


Beautiful Book, Pretty Price

Now available for Aperture Photo Books is a Layflat Printing option. Get seamless, edge to edge printing, at a price none of our competitors can beat!
Layflat Photo Books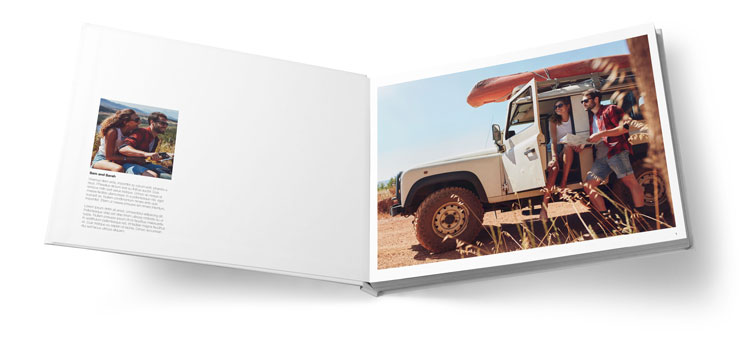
Flap-tastic
New for our Layflat Photo Books, print your interior dust jacket flaps straight onto the interior of the book. We think this is just Flap-tastic! Order your Aperture book as a seamless layflat photo book with dust jacket flaps in your PDF file, and we will apply this new feature automatically for you.
When creating your book in Aperture it is very important to understand how to best format it for printing with us. However there are two key things to remember:
- Adjust Text and Pics so they don't get cut off.
- Do not change your project size!
What If I Save My File In a Different Way?
Don't say we didn't warn you! There can formatting issues, your dust flaps could be included in the interior, and your order might be delayed by going into Customer Check since we want to make sure you have the chance to fix any potential issues that we can catch!
A Few More Notes of Caution
- Make sure you use the magical instructions above for saving your file!!! Please do NOT use the File>>Print>>Save as PDF method as it will not give you the correct output.
- Make sure the Presets option is set as "Default Settings"
- Extra Large projects should show the paper size as 12.62x9.75 and Large projects should be 8.50x11.00. Do not, we repeat, do not change the size for your project.
Adjusting Text and Pics so They Don't Get Trimmed
When creating your page layouts in Aperture it is very important to understand trim as a standard part of printing, and how to account for that trim. Properly placed pages will let your beautiful work shine! Due to the difference in trim sizes, sometimes Aperture can place vital content (such as marriage proposals or little Johnny's face) too close or under the crop guide, which will lead to unwanted results. Get ready for some totally important text because our tips below will help keep your future and children in check! Well, at least on the page.
Covers
After uploading your front, back, or full wrap covers, you’ll be shown a preview of the full cover including crop guides in Step 2. These crop guides are:-
The red crop guide indicates a .25" for softcovers. Softcovers have approximately 1/8” trimmed but cropping and bleed is recommended at .25" to account for shifting that can occur.
- The red and pink crop guides combined indicate the trim and fold guides for hardcovers. Hardcovers require a wider, roughly ½” bleed in addition to the .25", as the cover image is wrapped around a board (very similar to wrapping a present). We do recommend adding an additional .25" as a saftey measure, as content exactly .75” from the edge will be directly against the edge of the cover. This will make a total 1" margin for hardcovers.
Interiors
The automatic trim area for standard size interiors is approximately 1/8 inch on all sides, however we cannot guarantee any content that is within a full .25” from each edge of the page due to shifting that can occur in production. This is .25" is referred to as the "caution area" and represented by the red crop guide. It is something we are unable to change or adjust for a specific book as trim occurs during manufacturing to give your book a polished, finished look. In order to produce the best results possible, all vital content should be kept within the caution area with all non-vital content fully extended to the edge of the page. This ensures that no vital content is trimmed and there is no unwanted solid border remaining around the page.A Little Help for Both
There is hope if your important content is under the guides: the super amount of control that Aperture allows makes it pretty easy to adjust, once you get the hang of it! While your book is lookin' good, by default text (and sometimes faces) is usually too close to the edge page/cover, which can result in important things being trimmed. Check below for the visual and textual help!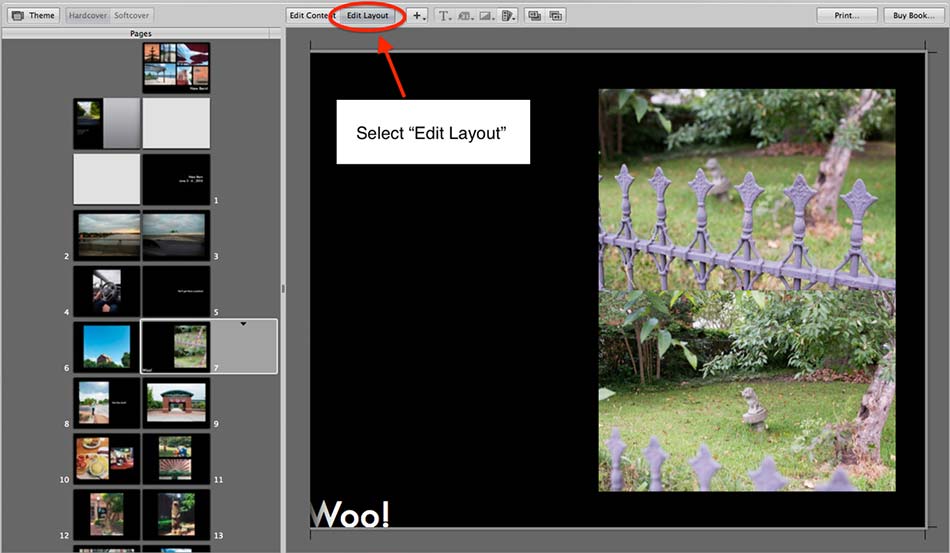
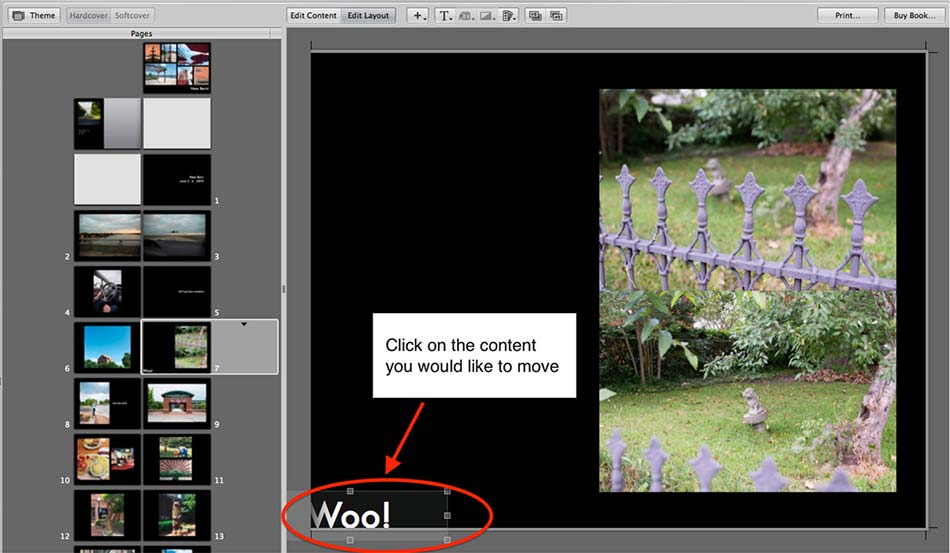
Step 1
Click Edit Layout and select the item you'd like to change
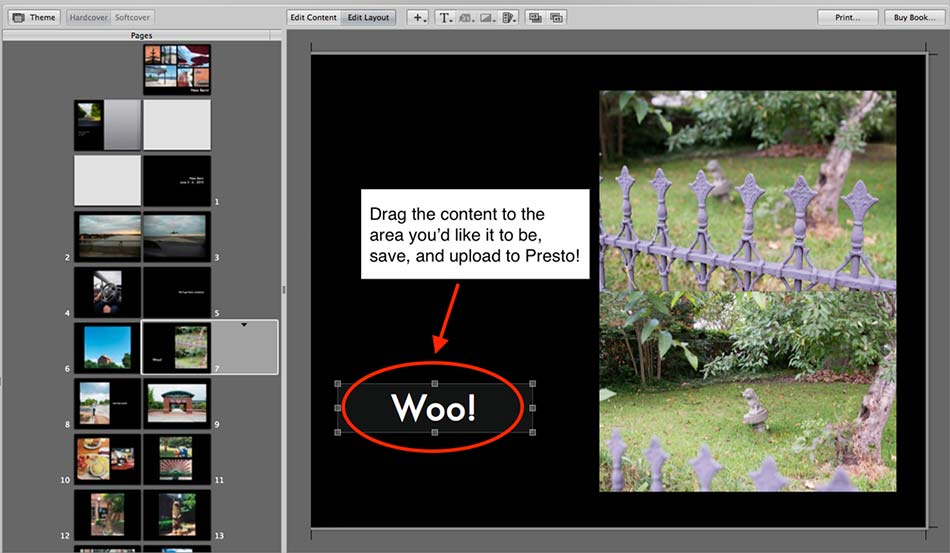
Step 2
Use the square handles to move the text boxes towards the center of the page and adjust the sizing
Step 3
Make sure that your cover and interior pages follow our Crop and Bleed guidelines for the best results!
Those Hidden Page Numbers
Apple's software generally pushes page numbers very close to the edge of the page. Sometimes it's ok, but due to the different trim size between us and Apple it can become a problem for your page numbers. Because of this we generally recommend removing them, as they can be right at the crop guide that makes them fully or partially disappear in production. Check out the steps below to remove them:
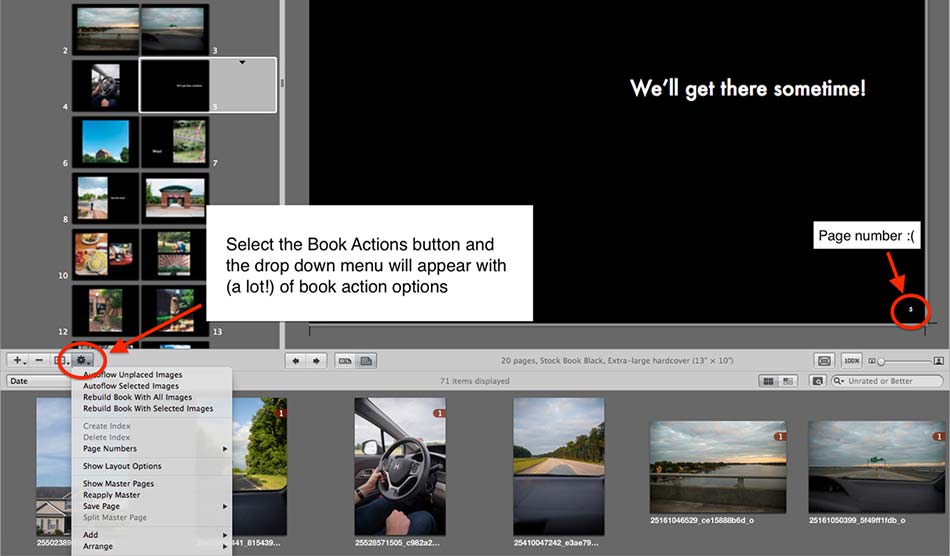
Step 1
Within your project click on "Book Actions"
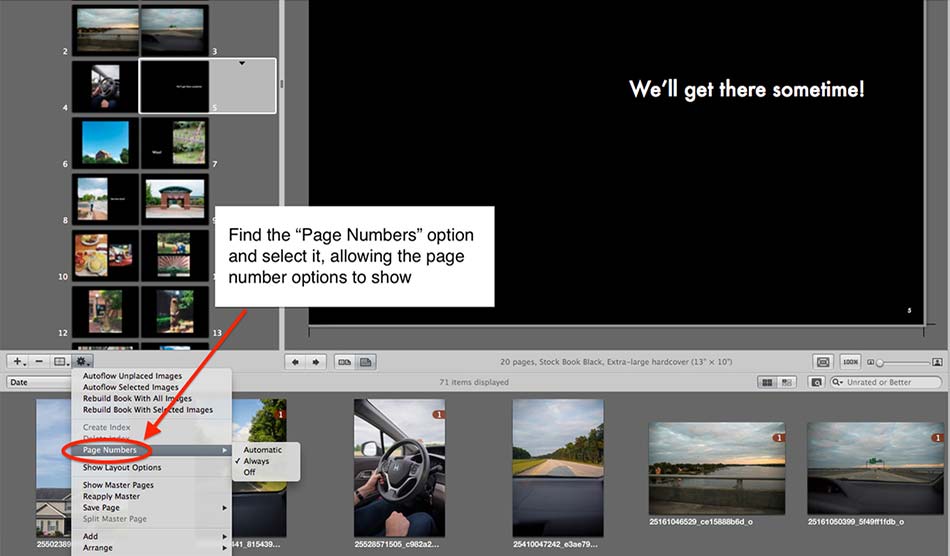
Step 2
Select the Page Numbers options
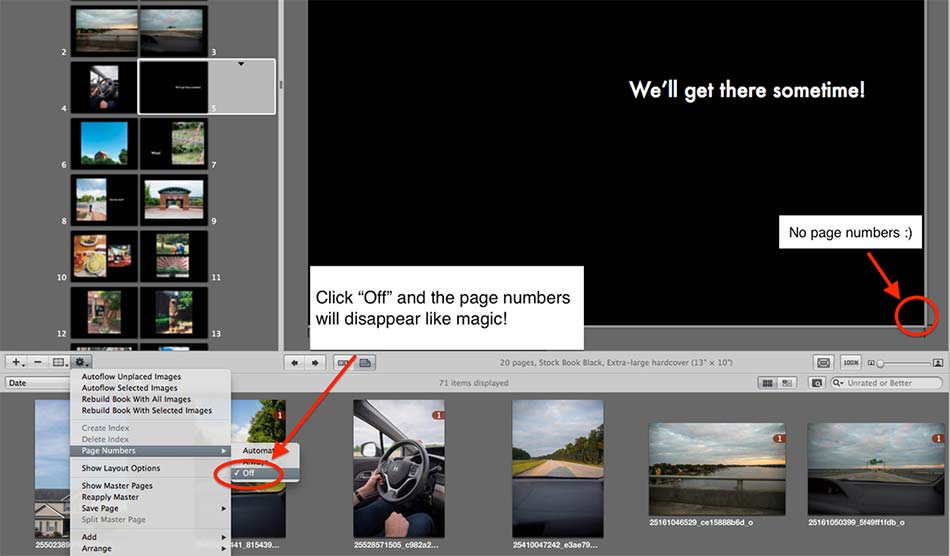
Step 3
Click "Off" to remove all page numbers.
A Few More FAQs
Think of us as fraternal twins with Apple; our slogan is “Compatible, not identical”. While we print very similarly to Apple, we are a bit different since we’re not the same company, nor do we use the same print floors. We have a slightly more aggressive crop line and there can always be some quality differences depending on personal preference. However, we do take pride in our product and offer a crazy amount of more options for purchase as well as a lesser cost to you!
Note: We highly recommend that everyone checks out our page on making your images Presto ready, and the best they can be. This will help with (what could be) much heartbreak!
Right now we offer our dust jackets with 11x8.5 and 13x10 Hardcovers, though our books do not come with a jacket by default. For 11x8.5 you can select the dust jacket option shown during checkout to receive a jacket with your book. For 13x10, to ensure your book includes a dust jacket, you'll need to request one in the order comments when checking out for now, though we should have that option available when checking out soon!
You sure can. From the Webstore for your book, click on the “Layout” button underneath the cover image. Once this page loads be sure to check the box for “Show Crop Guides” and take into consideration the crop guides for your project size. With most Apple books this will be the red crop guide. Anything under that guide is subject to being trimmed during production, so be sure to keep any important elements (such as marriage proposals or little Johnny’s eyes) out of the red or say goodbye!
For some programs, the spine text you use will be imported, however Apple has made the decision to not include the full dimension cover when you save out your PDF for uploading to another site with Photos. This means they include the front and back covers in your PDF, but none of the spine content that you may have created for your book. We do not have any control over the Spine Text uploading with your Apple Photos PDF since it was Apple's decision to not include it.
There is hope though! If your spine text is not included in your Apple PDF, we do offer a Spine Text tool after uploading your book that will allow you to add your own! Once you’ve uploaded your book in Step 1, follow the steps below:
- In Step 2 scroll to the box labeled "Cover Text & Colors", just underneath the cover preview.
- Click on the "None" that is next to Spine Text and enter whatever text you'd like in either the Top or Bottom Spine Text boxes. The text will show as a Preview when you click off the editors.
- When you're happy with the text, click "Update Cover" at the bottom of the page and the page will refresh showing your Spine Text on the cover.
- If you're happy with the preview then you're all set! Otherwise, you're free to edit (and edit again) as much as you need! Just remember to click "Update Cover" when you make any changes so that they are saved.
Absolutely! We love helping Apple customers print their photo books and don’t limit them to only 100 pages. Some stories need a little more space! Once you’ve created your books it’s easy to combine the books on your computer, simply follow the steps below:
- Create your books and save them following the steps for iPhoto, Aperture, or Photos with each part labeled (i.e. Part 1, Part 2)
- Open all parts of your iPhoto book in Preview
- Turn on the Thumbnail view in each Preview window by selecting View > Thumbnails
- Drag the thumbnail of the second PDF on top of the first and release it when the first highlights
- Enjoy your over 100 page iPhoto book!
Absolutely! With PrestoPhoto there is no need to make a new book for each size you'd like. One size can (mostly) fit all! Any additional sizes that are available will show in your book's Webstore, which is found after you click Buy Now in the Uploader!
We aren't able to make any adjustments to color, however there is a way to change the brightness setting before exporting the PDF for uploading. Instructions on that are below:
- Complete your PDF in Aperture
- Select the "Print" button from the upper right of the page and click "Show Details" in the print screen if it's available (it would be at the bottom left)
- There is a section on that screen that says "Brightness" and adjust the bar a bit until your preview image shows to the brightness you prefer.
- Choose "Save as PDF" from the drop down menu at the bottom left » Name your file and click Save
- Upload the PDF to Presto
- Once this is uploaded you can view the adjusted interior at the Layout Preview, which will show towards the top of the screen in the Cover step (Step 2).
We've recently found that Apple would automatically lighten PDFs as much as one full stop prior to printing, however our software is not able to do that. These steps should help though!
Don't panic! These white borders are what we call "Clipping Objects". We remove these white borders when you upload your book to our side. Once uploaded, review your Layout Preview. If you still see these white borders, shoot us an email at support@prestophoto.com and we can fix that right away!
Comments
still printing 12.62x9.75? Your purchases options only show 13x10
Purchase option request: Dustcover + Hardcover printing
Tanzania 2015 Anne Wells Book 1
Please don't use margins on this book
Kim Crosby
203-524-4125 (c)
203-656-1662 (h)